What was your last home project and what is your next home project?
Page 3 - Seeking answers? Join the AnandTech community: where nearly half-a-million members share solutions and discuss the latest tech.
You are using an out of date browser. It may not display this or other websites correctly.
You should upgrade or use an alternative browser.
You should upgrade or use an alternative browser.
sdifox
No Lifer
- Sep 30, 2005
- 101,180
- 18,212
- 126
They can still swim without a pump. As to just replacing the pump, you might not be able to. At least on mine the impeller is securely fastened to the shaft and I didn't see a way to remove it myself. Was trying to take it apart and clean the inside. Ended up just using compressor air to blow out the gunk.That's why we're gonna rip it apart. Luckily it's been cold and rainy lately so no one lost any time swimming here. That would've been a fucking crisis according to my wife and kid! Lol
My pool is going to be renoed this year. Thinking slate.
Last edited:
Lost_in_the_HTTP
Lifer
- Nov 17, 2019
- 13,454
- 7,907
- 136
Last time my pool needed to be 'reno'd', I rolled it up, took it to the dump and bought another one from Big Lots for $110
Took about an hour to unbox it and set it up.
Took about an hour to unbox it and set it up.
sdifox
No Lifer
- Sep 30, 2005
- 101,180
- 18,212
- 126
I don't own a dog.Last time my pool needed to be 'reno'd', I rolled it up, took it to the dump and bought another one from Big Lots for $110
Took about an hour to unbox it and set it up.
Red Squirrel
No Lifer
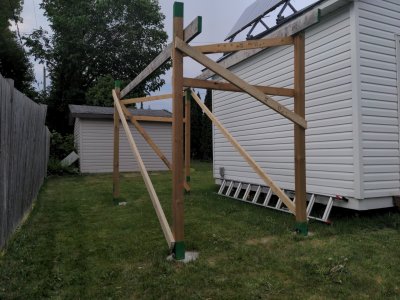
I always have tons of projects going on and lot of them unfinished but my current one is adding a mostly flat solar array next to my shed, which will double as an area to store firewood. It's not the nicest thing but keeping it fairly basic. Was hoping I could get away with only bracing it at the top but it was not enough so had to bring my braces down to the bottom.
I find it looks a bit ricketty with the bracing, so I might add lattice on at least 3 sides so it looks a bit more finished. The front part is where I will go in to store the wood so want to keep it open as much as I can. Had to add that extra brace on the front but at that angle it's still a tad wobbly, but I will see how it works out once I add all the carriage bolts everywhere. Right now it's just deck screws.
I can only stand working on this in short spurts because the neighbours dogs bark at me and try to jump the fence the entire time while the owner tells it to stop, and it gets pretty annoying. It's also super hot in that part of the yard, the sun just hits different there for some reason. Maybe because of how it reflects off the white siding. Either way once those solar panels are up there I will get lot of production I think. I figure close to 1kw. The angle is not optimal but it's a compromize to have them also double as a roof, and also get sun for a longer part of the day.

deadlyapp
Diamond Member
- Apr 25, 2004
- 6,683
- 752
- 126
Probably would have been fine supported only at top but you're likely not anchored well enough at the bottom. Posts woould need to probably be at least 4ft sunk in the ground with concrete to be stable enough.I always have tons of projects going on and lot of them unfinished but my current one is adding a mostly flat solar array next to my shed, which will double as an area to store firewood. It's not the nicest thing but keeping it fairly basic. Was hoping I could get away with only bracing it at the top but it was not enough so had to bring my braces down to the bottom.
I find it looks a bit ricketty with the bracing, so I might add lattice on at least 3 sides so it looks a bit more finished. The front part is where I will go in to store the wood so want to keep it open as much as I can. Had to add that extra brace on the front but at that angle it's still a tad wobbly, but I will see how it works out once I add all the carriage bolts everywhere. Right now it's just deck screws.
I can only stand working on this in short spurts because the neighbours dogs bark at me and try to jump the fence the entire time while the owner tells it to stop, and it gets pretty annoying. It's also super hot in that part of the yard, the sun just hits different there for some reason. Maybe because of how it reflects off the white siding. Either way once those solar panels are up there I will get lot of production I think. I figure close to 1kw. The angle is not optimal but it's a compromize to have them also double as a roof, and also get sun for a longer part of the day.
Red Squirrel
No Lifer
Probably would have been fine supported only at top but you're likely not anchored well enough at the bottom. Posts woould need to probably be at least 4ft sunk in the ground with concrete to be stable enough.
Yeah true if I had buried the posts it would probably be better as they would be solid on their own. Right now they are on pivot points. Downside of burying is they are more likely to rot faster but if you burn the surface apparently it helps with that.
deadlyapp
Diamond Member
- Apr 25, 2004
- 6,683
- 752
- 126
Dip the ends in tar/creosote/whatever prior to dropping them into the concrete and you'd get 15+ years probably. Even just in concrete you'd probably be fine for 10. Fences last foreverYeah true if I had buried the posts it would probably be better as they would be solid on their own. Right now they are on pivot points. Downside of burying is they are more likely to rot faster but if you burn the surface apparently it helps with that.
When I rebuilt my wood retaining wall I did it all. Pressure treated posts dipped in tar based water proofing, concrete above the surrounding grade sloped to shed water, drainage behind the wall with pipe and gravel. Half the posts were rotted off within 15 years.Dip the ends in tar/creosote/whatever prior to dropping them into the concrete and you'd get 15+ years probably. Even just in concrete you'd probably be fine for 10. Fences last forever
I'm not convinced there is a good method of planting posts in the ground.
Lost_in_the_HTTP
Lifer
- Nov 17, 2019
- 13,454
- 7,907
- 136
Which is why those type of post anchors came to be. Concrete in the ground with the post anchor embedded. Post bolted to the anchor above ground, supposed to be an inch or so. When done right, they should last longer and be stronger.When I rebuilt my wood retaining wall I did it all. Pressure treated posts dipped in tar based water proofing, concrete above the surrounding grade sloped to shed water, drainage behind the wall with pipe and gravel. Half the posts were rotted off within 15 years.
I'm not convinced there is a good method of planting posts in the ground.
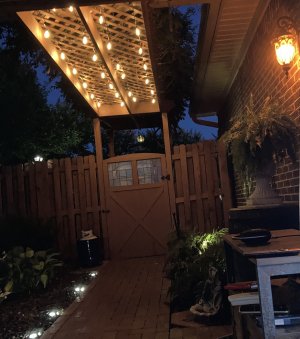
New fence on the right side of the house. I’ve been tossing out sections due to rot over the past, uhm, 3 ish years. Too sad looking at this point and not providing the 'virtual' separation we want from the neighbors. I’ll have to contract it - too much for my back these days 😢. Probably going from a 4’ high fence to 6-8’. Have to drop it to 4’ near the back street per code. Debating $$ vinyl.
I've installed hundreds of them, they don't work for retaining walls. The heavy two strap anchors will work for fence posts.Which is why those type of post anchors came to be. Concrete in the ground with the post anchor embedded. Post bolted to the anchor above ground, supposed to be an inch or so. When done right, they should last longer and be stronger.
iRONic
Diamond Member
- Jan 28, 2006
- 8,554
- 3,848
- 136
Just did the layout for my MIL's headboard. Starting with a walnut slab, so it's a serious scratch build.
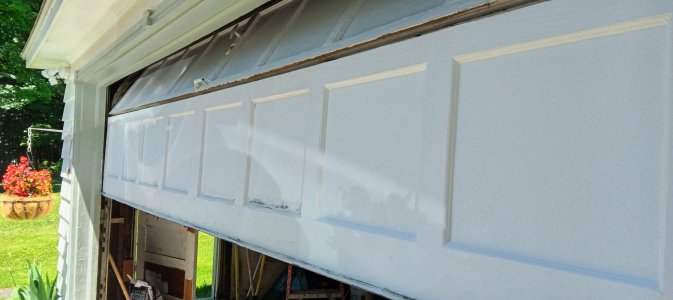
5 or 7 years ago I fabricated the bottom segment of my odd size garage door using Douglas Fir material from the depot. For the panels I found 1/4 in sheet goods already sized down (from China) which has been failing for a few years. I left provisions for replacement of these panels when built. This time i'm trying Hardi Backer. Two done.


Muse
Lifer
- Jul 11, 2001
- 41,350
- 10,473
- 136
Muse
Lifer
- Jul 11, 2001
- 41,350
- 10,473
- 136
Those red tile edges look exactly like what I have in my kitchen. Do you know how to get more? I need to work on mine, some are in not good shape...Tile on the BBQ in the backyard started separating so time to update. My neighbor is a tile contractor who said piece of cake, would help me do it. So I wait, and wait, and wait and pretty soon wifey is in my ass about getting it done. So figure I'd give it a shot. Top was rotted so had to lay down new plywood. So I cut a sheet of 1 1/4" plywood to size. Neighbor hears me cutting something and comes over and kind of goes oops sorry been really busy. Brings me a gallon of a liquid tar that he uses on some showers.
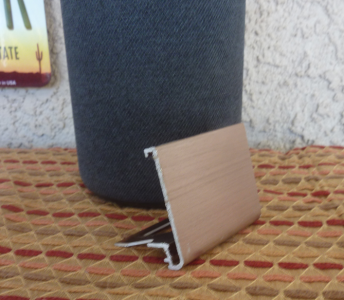
Then suggests a product called Schulter tile edge. He orders it for me, then to Home Depot to get the cheapest granit squares they have. Then to Craigslist for a used wet tile saw. Tells me if I don't understand come get him before I go further.
Happy with the way it turned out.
View attachment 98178
You should have them contact their insurance company before you start repairs.Those red tile edges look exactly like what I have in my kitchen. Do you know how to get more? I need to work on mine, some are in not good shape...
It's called Schluter, they make a couple different products. Here is a link to my productThose red tile edges look exactly like what I have in my kitchen. Do you know how to get more? I need to work on mine, some are in not good shape...
link

I'm in the middle of installing a garage door opener. New garage built two years ago by contractor, now I'm finally getting to this detail. I added a stiffener beam across the door top full width, fastened in place with carriage bolts, 1¼" fender washers under their heads, and locking nuts. Beam and all bolt heads / washers painted white three coats. Heavy-duty pull bar supplied with the door was installed on it for connecting the opener pull link. Had to adjust the mounting of the opener puller beam bracket on the garage rear wall to ensure it clears below the roof trusses. Yesterday I assembled the puller beam and chain, attached that to the motor body.Today I got the motor end suspended from steel perforated L-bars attached to the truss cross beams, then I'll add a couple X-brace reinforcing bars on the suspension L-bars. After that comes installing the wiring for control box and safety detectors, and adjustments to those. Last stage will be to install and activate WiFi connections to an app on my phone - we installed a high-performance WiFi access unit in the garage via cable buried (same trench as the electrical supply cable) from our home wired network.
Last edited:
Red Squirrel
No Lifer
Installed a wood stove so I can save on my gas bill as it's been climbing fast each year. Took nearly 2 years since I was trying to hire it out and kept being given the run around so ultimately just waited for good weather when I'm off and did it myself.

Before

Cement board in place

Break in fire

Chimney
More pics/info of the install process here: https://www.anyf.ca/viewtopic.php?p=141320
Now I need to finish my firewood storage setup that I posted earlier about... I never ended up continuing work on that.
Before
Cement board in place
Break in fire
Chimney
More pics/info of the install process here: https://www.anyf.ca/viewtopic.php?p=141320
Now I need to finish my firewood storage setup that I posted earlier about... I never ended up continuing work on that.
- Dec 3, 2010
- 8,417
- 3,812
- 136
What brand opener did you go with?I'm in the middle of installing a garage door opener. New garage built two years ago by contractor, now I'm finally getting to this detail. I added a stiffener beam across the door top full width, fastened in place with carriage bolts, 1¼" fender washers under their heads, and locking nuts. Beam and all bolt heads / washers painted white three coats. Heavy-duty pull bar supplied with the door was installed on it for connecting the opener pull link. Had to adjust the mounting of the opener puller beam bracket on the garage rear wall too ensure it clears below the roof trusses. Yesterday I assembled the puller beam and chain, attached that to the motor body.Today I got the motor end suspended from steel perforated L-bars attached to the truss cross beams, then I'll add a couple X-brace reinforcing bars on the suspension L-bars. After that comes installing the wiring for control box and safety detectors, and adjustments to those. Last stage will be to install and activate WiFi connections to an app on my phone - we installed a high-performance WiFi access unit in the garage via cable buried (same trench as the electrical supply cable) from our home wired network.
It is a Chamberlain model C450C. I suspect the first C is to note a chain drive, and the last C to note this is the model distributed in Canada. For controls it came with:
1. A manual button module they call their Multi-Function Control Panel I mounted inside the garage;
2. Two 3-button Remote Control units to attach to in-vehicle sunvisors;
3. A Keyless Entry module to be mounted on the exterior of the garage to allow opening with a keypad code (I did not install this).
It also is equipped for use with an app you download for free called MyQ.This communicates with the opener motor unit by WiFi so you can operate from anywhere your phone has internet access. This app is registered to one Owner, and can add up to three Associates. In anticipation of this (and for use with other WiFi-enabled devices) we installed a good WiFi unit in the garage, connected to the house network by CAT6 cables buried in the same trench as the electrical power cable.
I had my garage built with a somewhat taller main sectional door. My door is 8 feet high, rather than 7 feet. So I at the same time I bought the adapter kit of parts that make the rail and associated chain longer to handle the longer door. No problem making that modest change in early assembly.
Installation was pretty easy for a home handyperson with clear instructions and diagrams. As several other places advise, I modified the door itself slightly by adding a strengthening bar across the top before installing the bar used to attach the opener pull bar to the door. The only issue I had was that the specification for position of the bracket that fastens the end of the drive rail to the frame above the garage door did not suit my garage. Doing it as specified would have placed the rail too high so it ran into the horizontal beams across the bottom of the roof trusses. I had to re-locate it so that the unit that travels along that rail (driven by the chain drive) could run slightly below the truss beams.
The system works very well. Range of the visor-mouted Remote Controls seems to be about 75 to 100 feet from the garage. Some product promos talk about belt-drive openers being quieter than chain-drive. This is a chain drive and I hear no odd noise - only the hum of the motor when it operates.
- Dec 3, 2010
- 8,417
- 3,812
- 136
I will be installing a Chamberlain belt drive opener this weekend. Replacing an old Wayne Dalton chain drive unit. Will post here about how it goes.It is a Chamberlain model C450C. I suspect the first C is to note a chain drive, and the last C to note this is the model distributed in Canada. For controls it came with:
1. A manual button module they call their Multi-Function Control Panel I mounted inside the garage;
2. Two 3-button Remote Control units to attach to in-vehicle sunvisors;
3. A Keyless Entry module to be mounted on the exterior of the garage to allow opening with a keypad code (I did not install this).
It also is equipped for use with an app you download for free called MyQ.This communicates with the opener motor unit by WiFi so you can operate from anywhere your phone has internet access. This app is registered to one Owner, and can add up to three Associates. In anticipation of this (and for use with other WiFi-enabled devices) we installed a good WiFi unit in the garage, connected to the house network by CAT6 cables buried in the same trench as the electrical power cable.
I had my garage built with a somewhat taller main sectional door. My door is 8 feet high, rather than 7 feet. So I at the same time I bought the adapter kit of parts that make the rail and associated chain longer to handle the longer door. No problem making that modest change in early assembly.
Installation was pretty easy for a home handyperson with clear instructions and diagrams. As several other places advise, I modified the door itself slightly by adding a strengthening bar across the top before installing the bar used to attach the opener pull bar to the door. The only issue I had was that the specification for position of the bracket that fastens the end of the drive rail to the frame above the garage door did not suit my garage. Doing it as specified would have placed the rail too high so it ran into the horizontal beams across the bottom of the roof trusses. I had to re-locate it so that the unit that travels along that rail (driven by the chain drive) could run slightly below the truss beams.
The system works very well. Range of the visor-mouted Remote Controls seems to be about 75 to 100 feet from the garage. Some product promos talk about belt-drive openers being quieter than chain-drive. This is a chain drive and I hear no odd noise - only the hum of the motor when it operates.
TRENDING THREADS
-
Discussion Zen 5 Speculation (EPYC Turin and Strix Point/Granite Ridge - Ryzen 9000)
- Started by DisEnchantment
- Replies: 25K
-
Discussion Intel Meteor, Arrow, Lunar & Panther Lakes + WCL Discussion Threads
- Started by Tigerick
- Replies: 24K
-
Discussion Intel current and future Lakes & Rapids thread
- Started by TheF34RChannel
- Replies: 23K
-
-

AnandTech is part of Future plc, an international media group and leading digital publisher. Visit our corporate site.
© Future Publishing Limited Quay House, The Ambury, Bath BA1 1UA. All rights reserved. England and Wales company registration number 2008885.


