HTPC/Gaming Rig -- New Build

cytoSiN

Platinum Member
Jul 11, 2002
2,262
7
81
Just finished building and burning in a new HTPC/Gaming rig, and wanted to post a build thread in case anyone else is interested in doing something similar (and/or just wants see some HTPC porn).

[Full Disclosure: I also posted this build at AVSForum, which I also frequent, but I'd like to discuss it here as well. Hopefully the "double post" doesn't offend anyone.]

The dual purposes of this build are, in no particular order, (1) to stream my recently ripped Bluray collection (and other media, including audio) to my home theater, and (2) to play the latest PC games that play better on a gamepad (imo, anything other than rts, fps, and some rpgs) on the big screen.

Parts list is as follows (some parts repurposed from earlier builds):

CPU : Intel i5 4670K (@4.0GHz)
MOBO : Asus Z87 Pro
RAM : 8GB G.Skill Ripjaws X (F3-12800CL8D-8GBXM) DDR3 PC3 12800 (@ 8-8-8-24)
GPU : EVGA GTX 760 SC ACX (02G-P4-3765-KR)
PSU : Corsair HX620W (subsequently replaced with Seasonic G550 -- see April post)
SSD : Intel 520 120GB
HDD : Samsung Spinpoint 500GB (HD501LJ)
OPTICAL : LG DVD-RW (no need for a Bluray drive, since everything will be streamed, and I can use the PS3 if I really need to load a disc)
CASE : Silverstone Grandia GD08B (including 3 120mm Silverstone intake fans -- will purpose option rack ears later this year)
CPU COOLER : Noctua NH-L12
FANS : Added 1xCM BladeMaster 120mm PWM intake fan and 2xArtic FM8 80mm exhaust fans (all three of these fans are daisy-chained with the 92mm and 120mm Noctua fans on the NH-L12, and are controlled using the same PWM header)

This new rig has been paired with the following existing equipment:

NAS : Synology 1511+ (w/ 5x2TB WD Caviar Black in SHR1 (8TB total))
SCREEN : Panasonic 55VT50
AVR : Onkyo TX-NR818
SPEAKERS : Polk Monitor II CS2, 70s, 60s, & 30s
SUB : 15" Titanic DIY Kit
Various and sundry classic gaming systems, as seen in final photos below (including original 1986 NES).

And now, without further ado, the build as graphic novel:

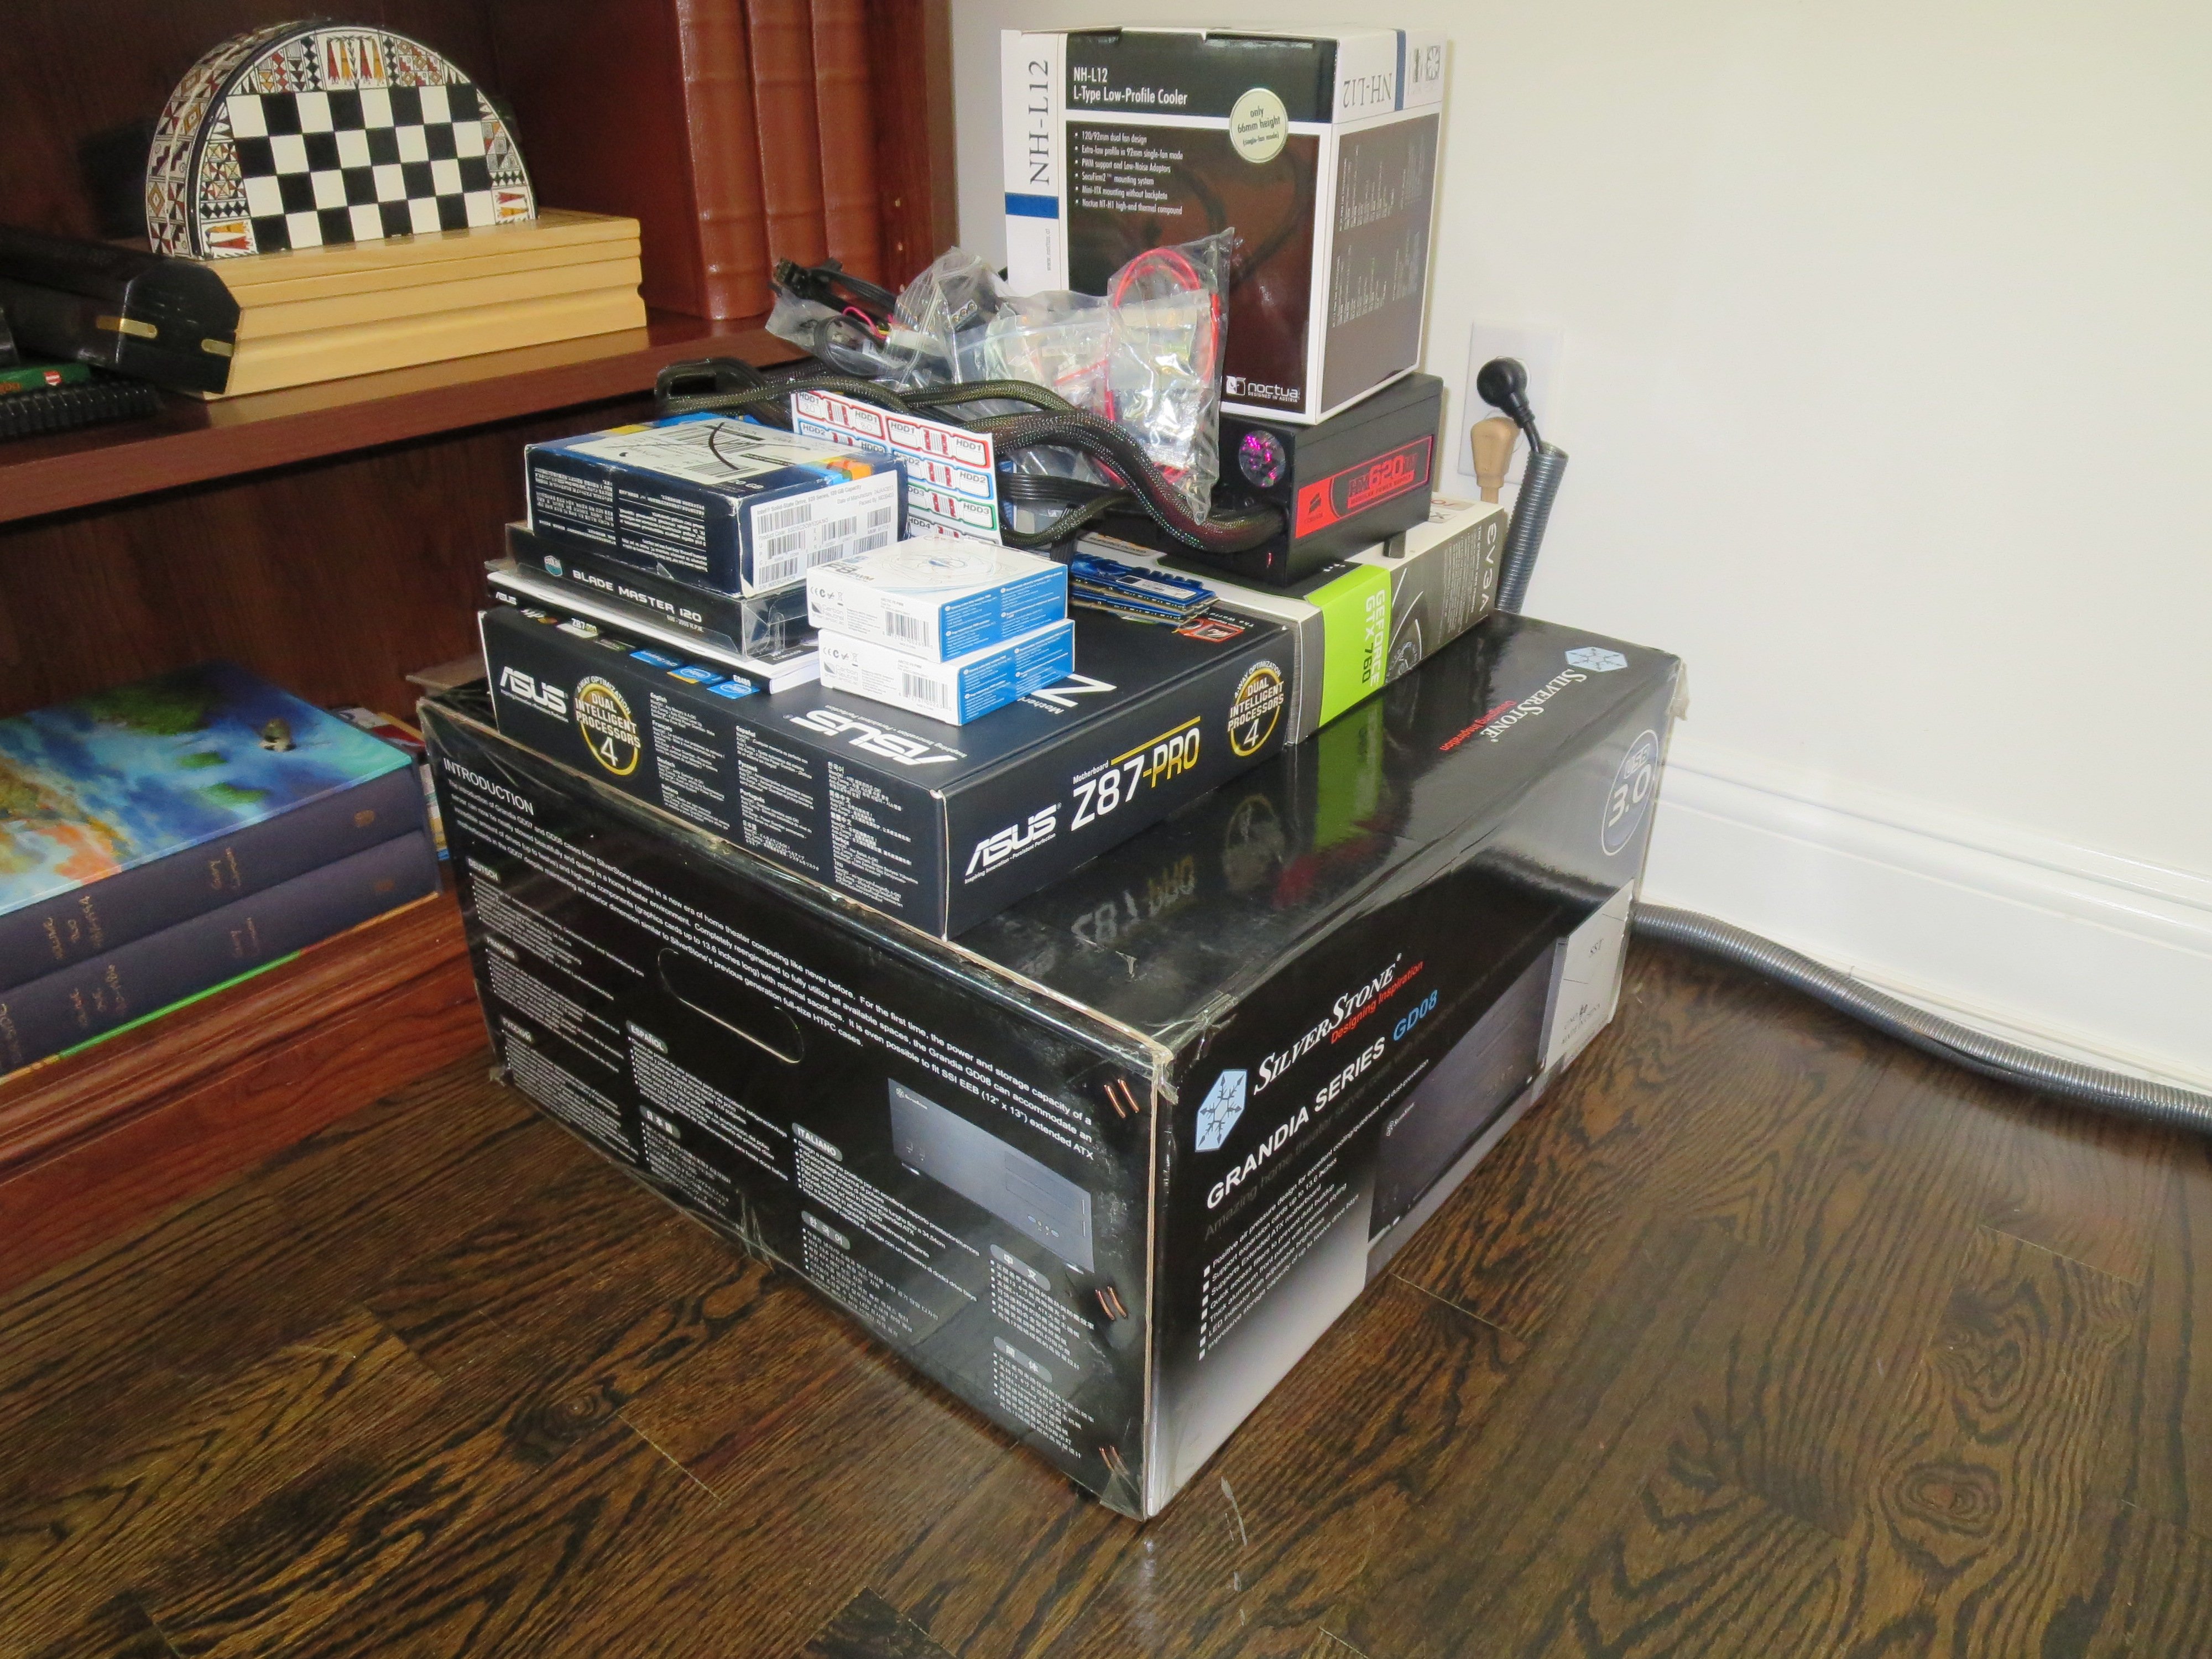
Some parts have arrived, waiting for the rest to start the build:
700


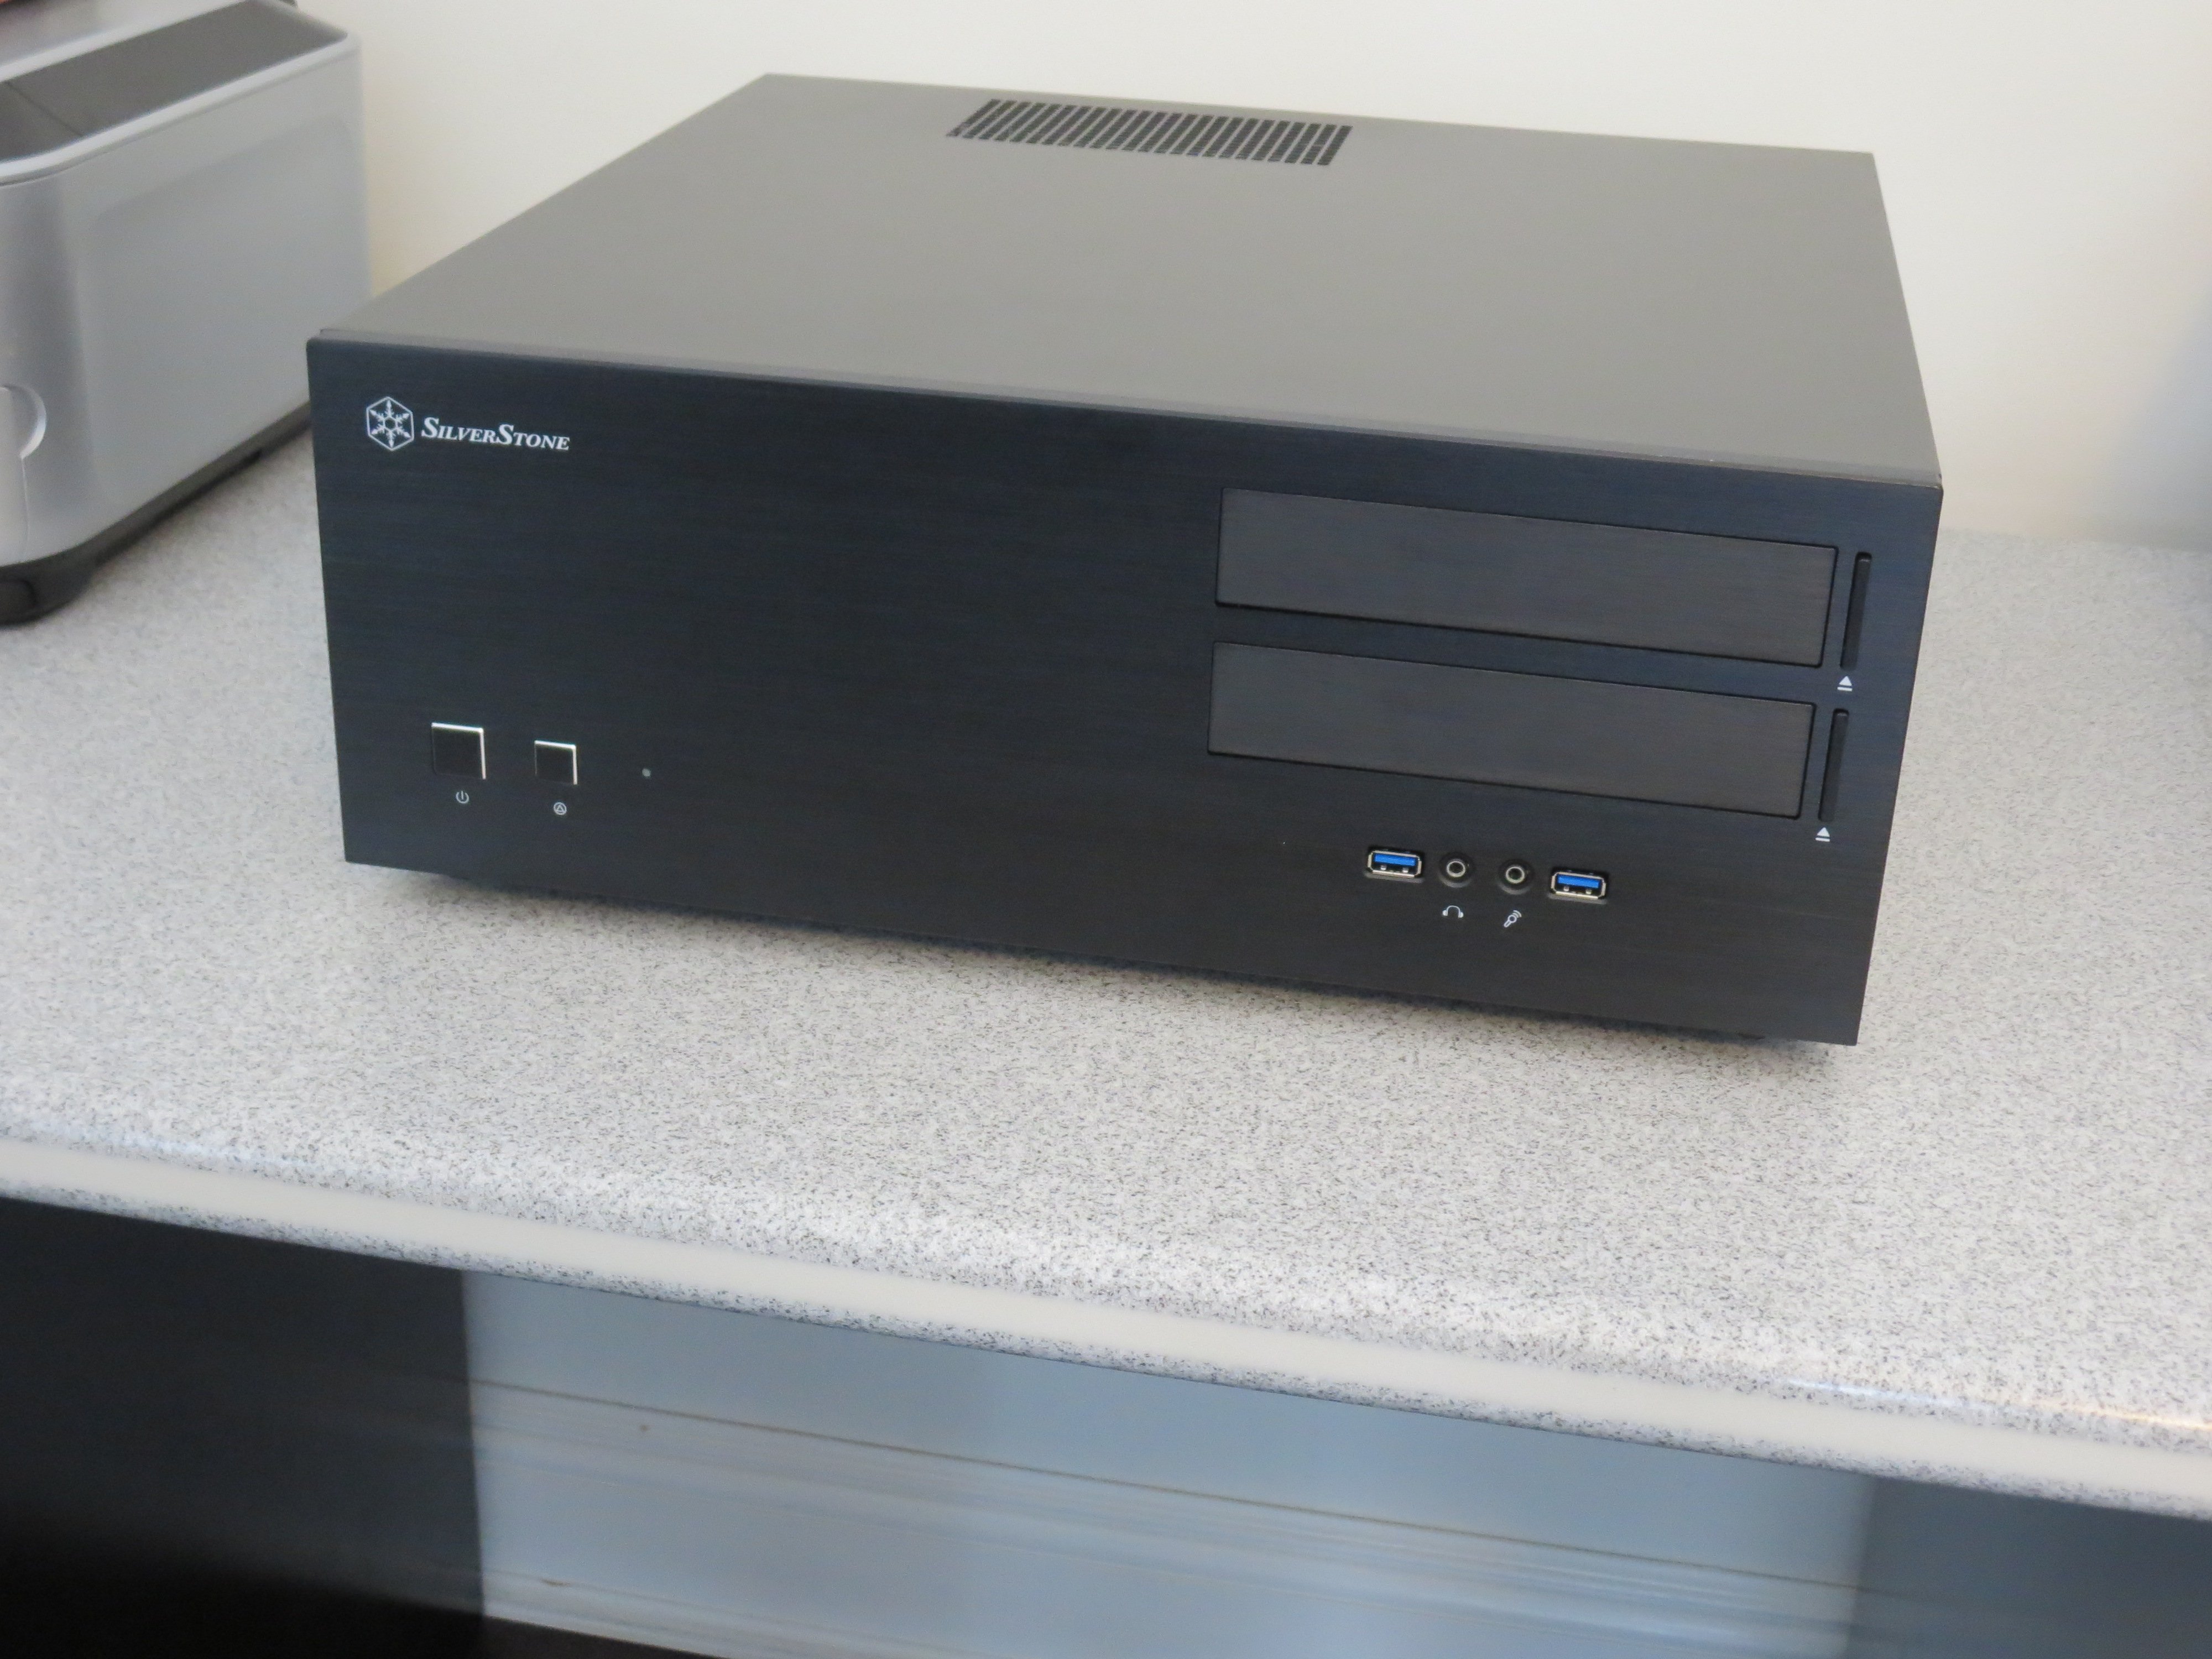
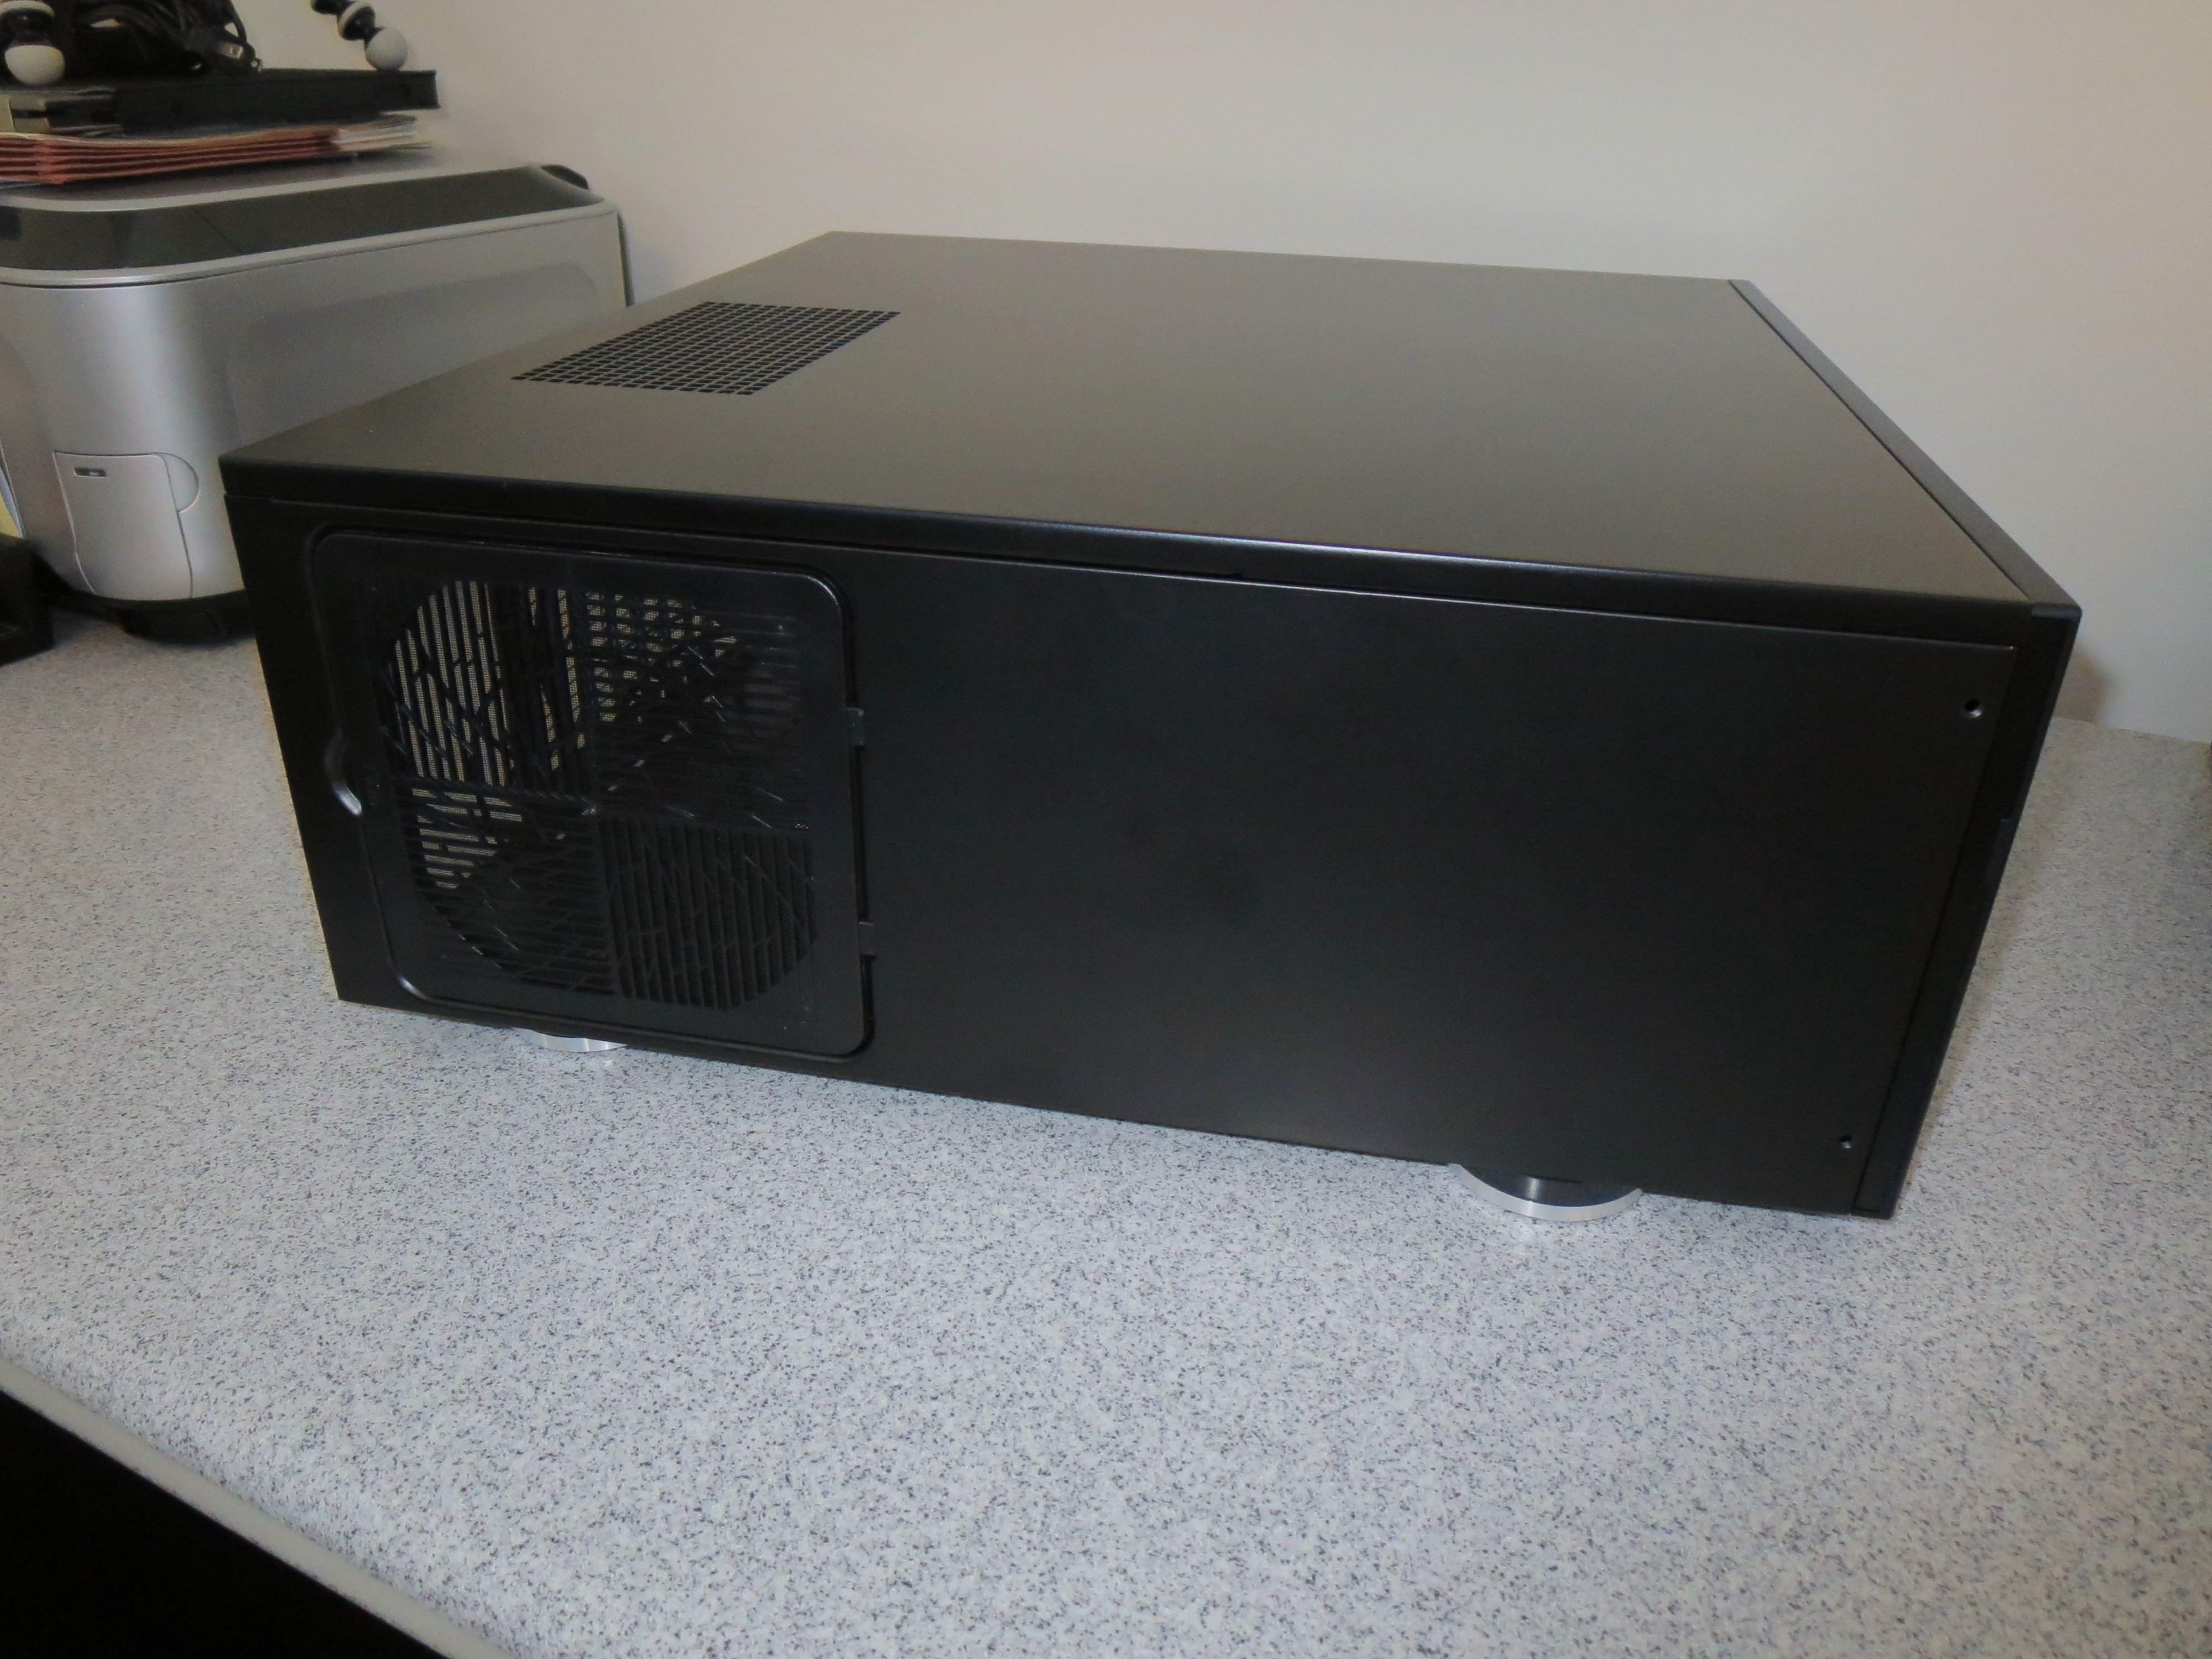
The case, unboxed. The brushed aluminum front looks fantastic...the picture doesn't do it justice.
700


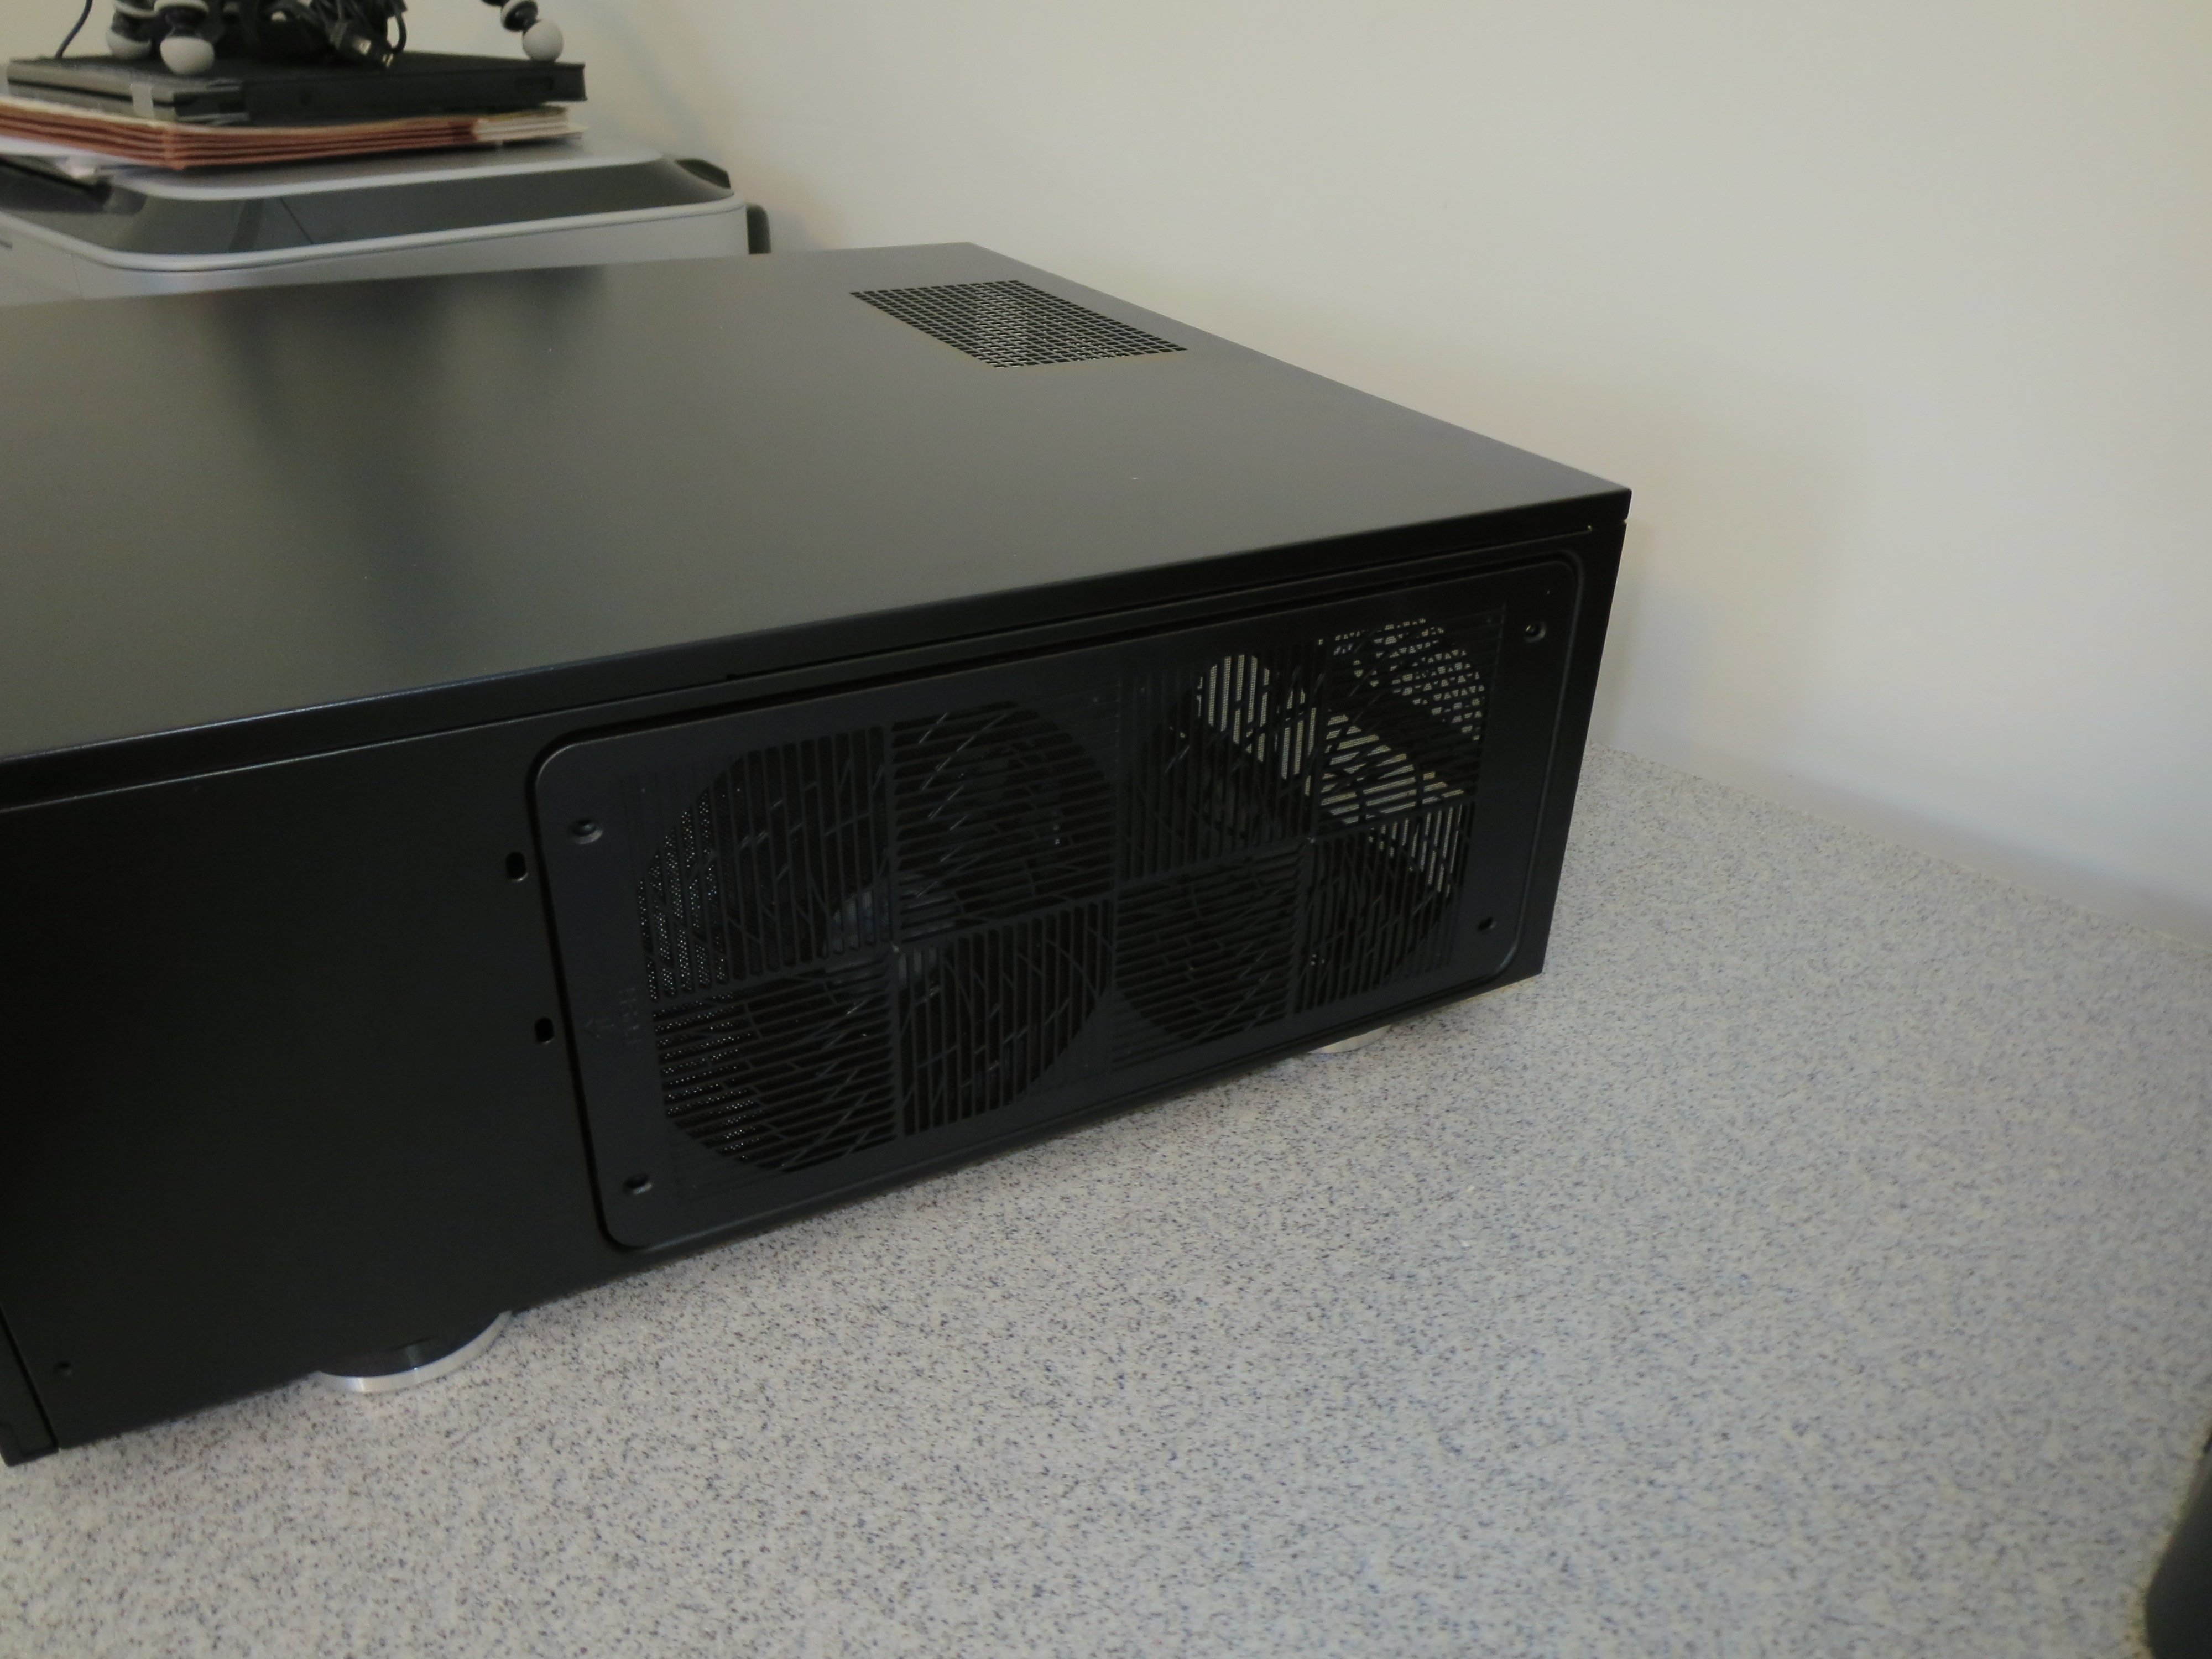
The case is set up for positive pressure, and has room for three bottom-mounted 120mm intake fans. Two of those slots come with 120mm Silverstone fans installed. The third slot is used internally for cable management--they have a very smart solution for this, seen below--but if you load the case with HDDs and want more cooling, you can remove the cable-management box and install a third bottom intake fan.

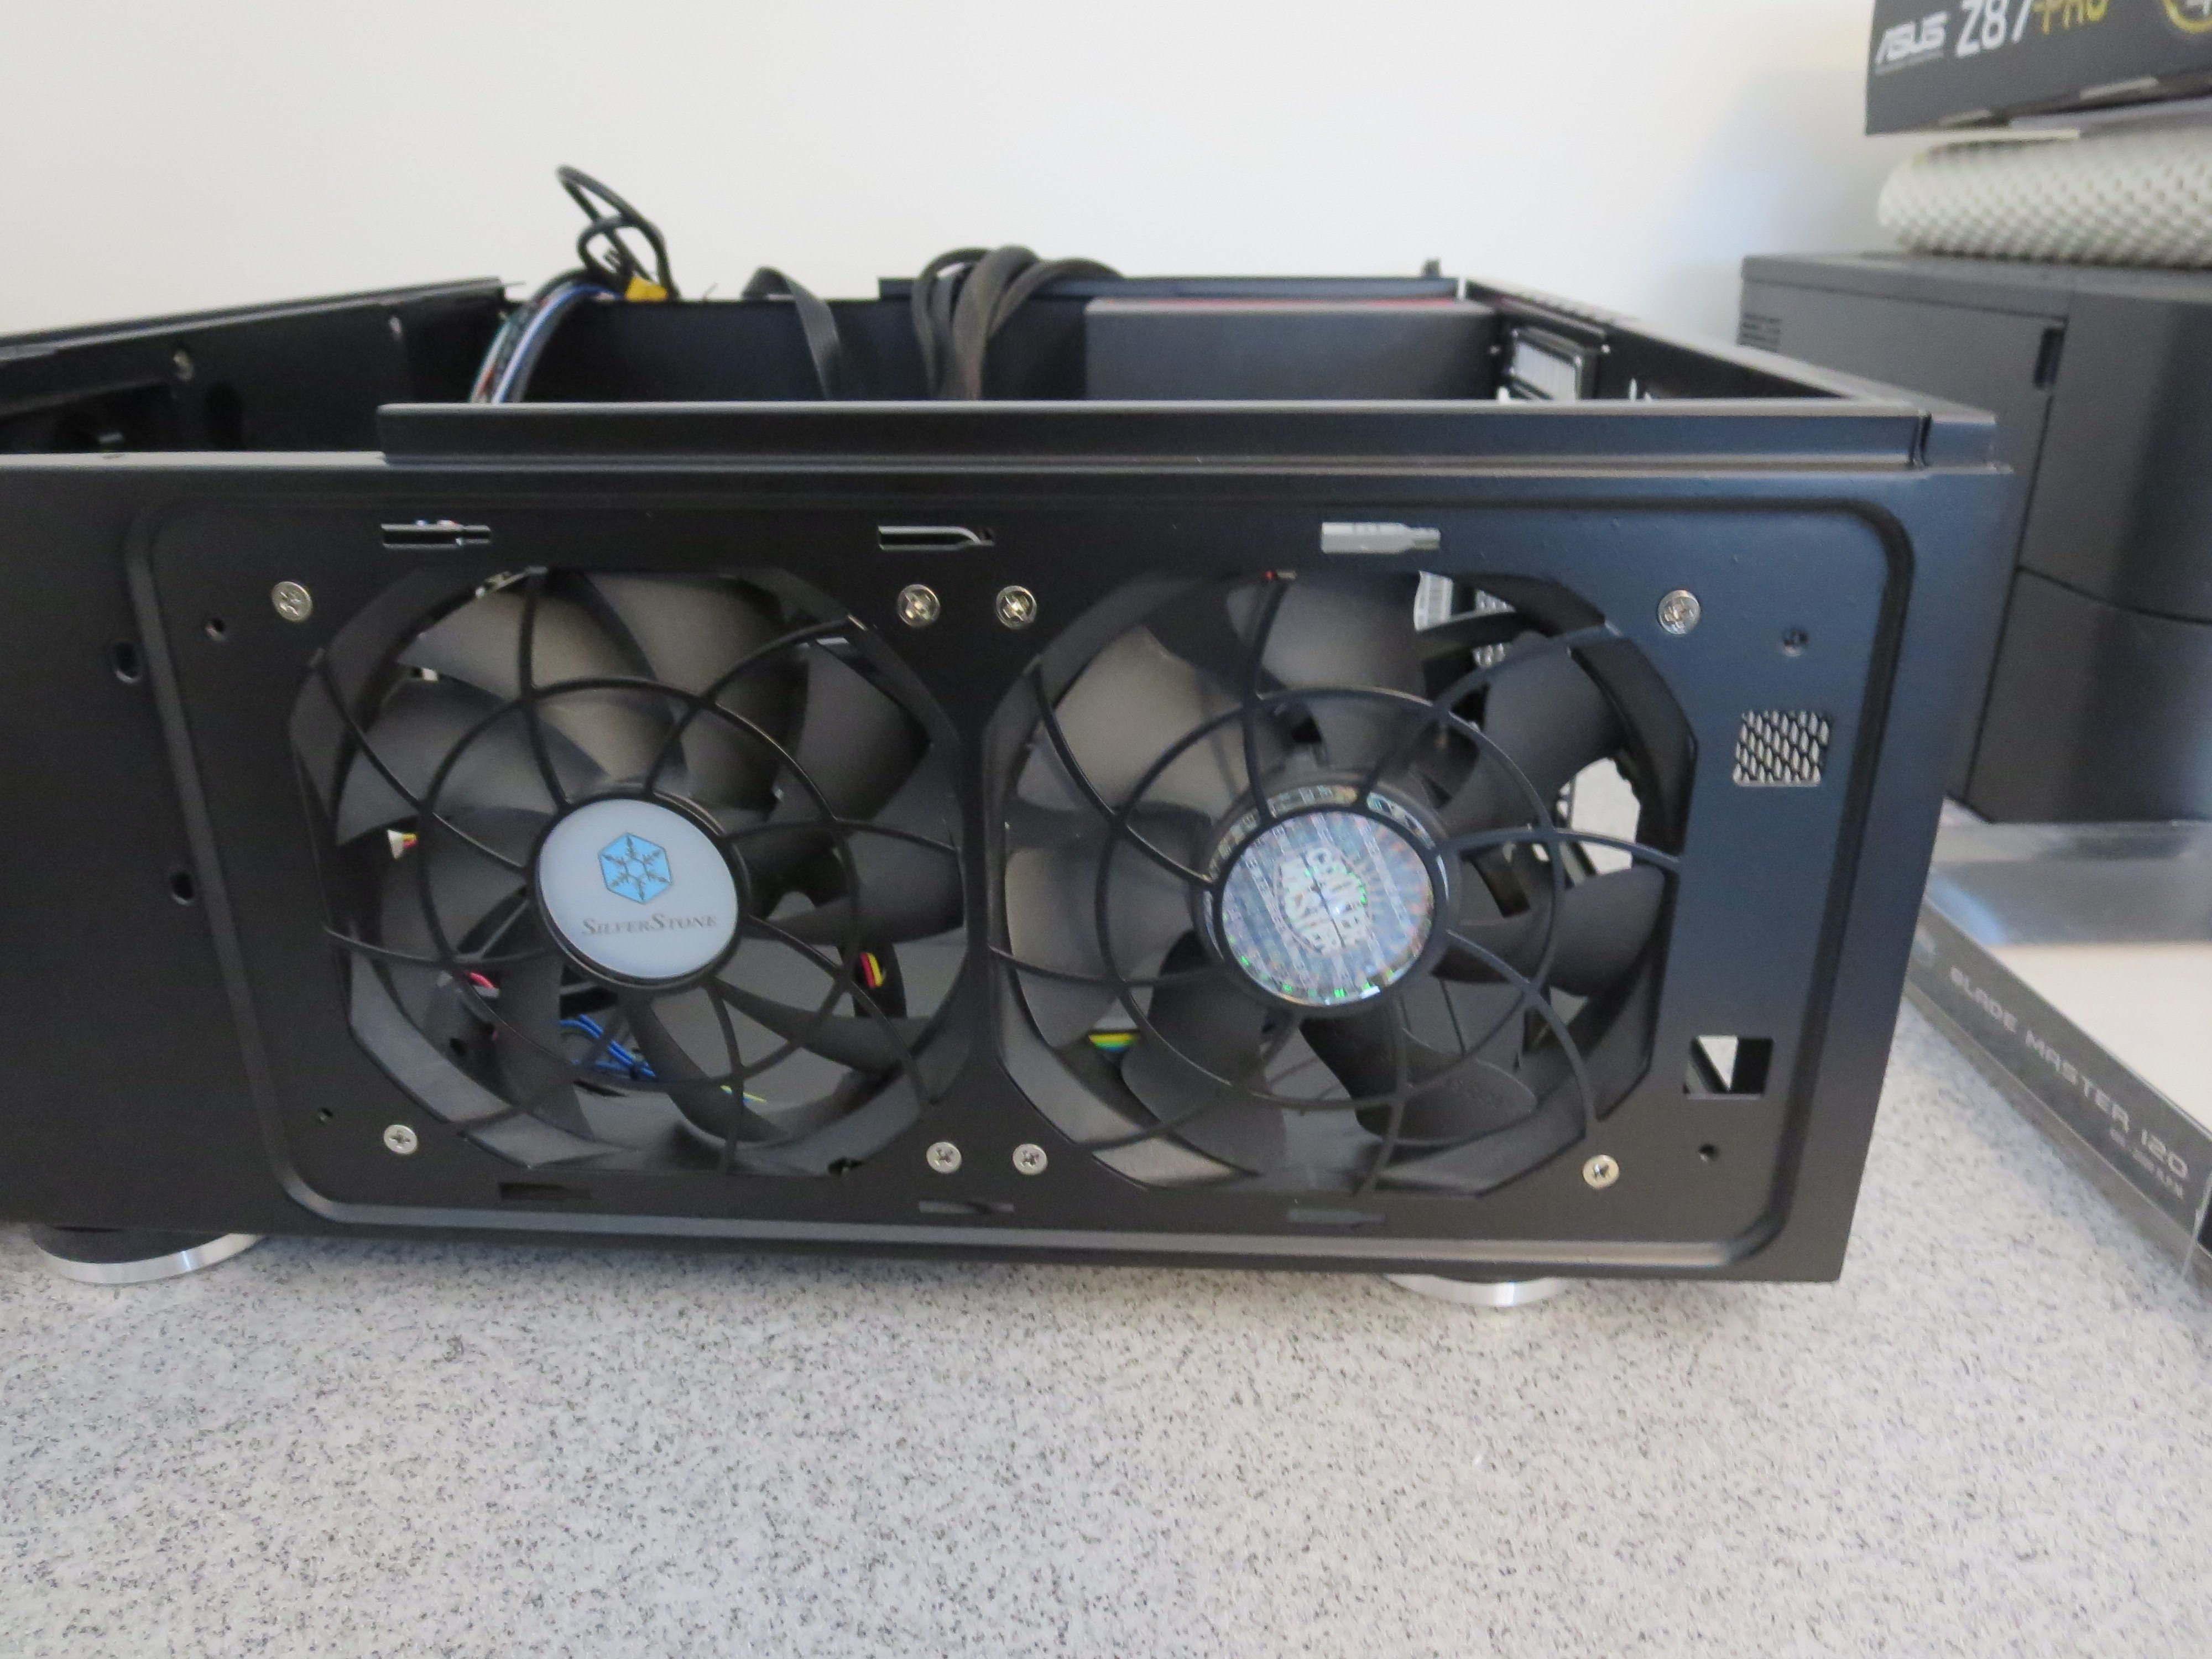
On the right side (when looking at the front), towards the back where the CPU is installed, is a dual-intake opening for two more 120mm fans. One slot comes preinstalled with another 120mm Silverstone fan. I installed a CoolerMaster 120mm BladeMaster in the other slot. As with all fan openings in the case, there are easy-access mesh screens installed on the outside of the case to keep dust out.
700

700


Even the PSU intake opening has an easily removable mesh screen.
700


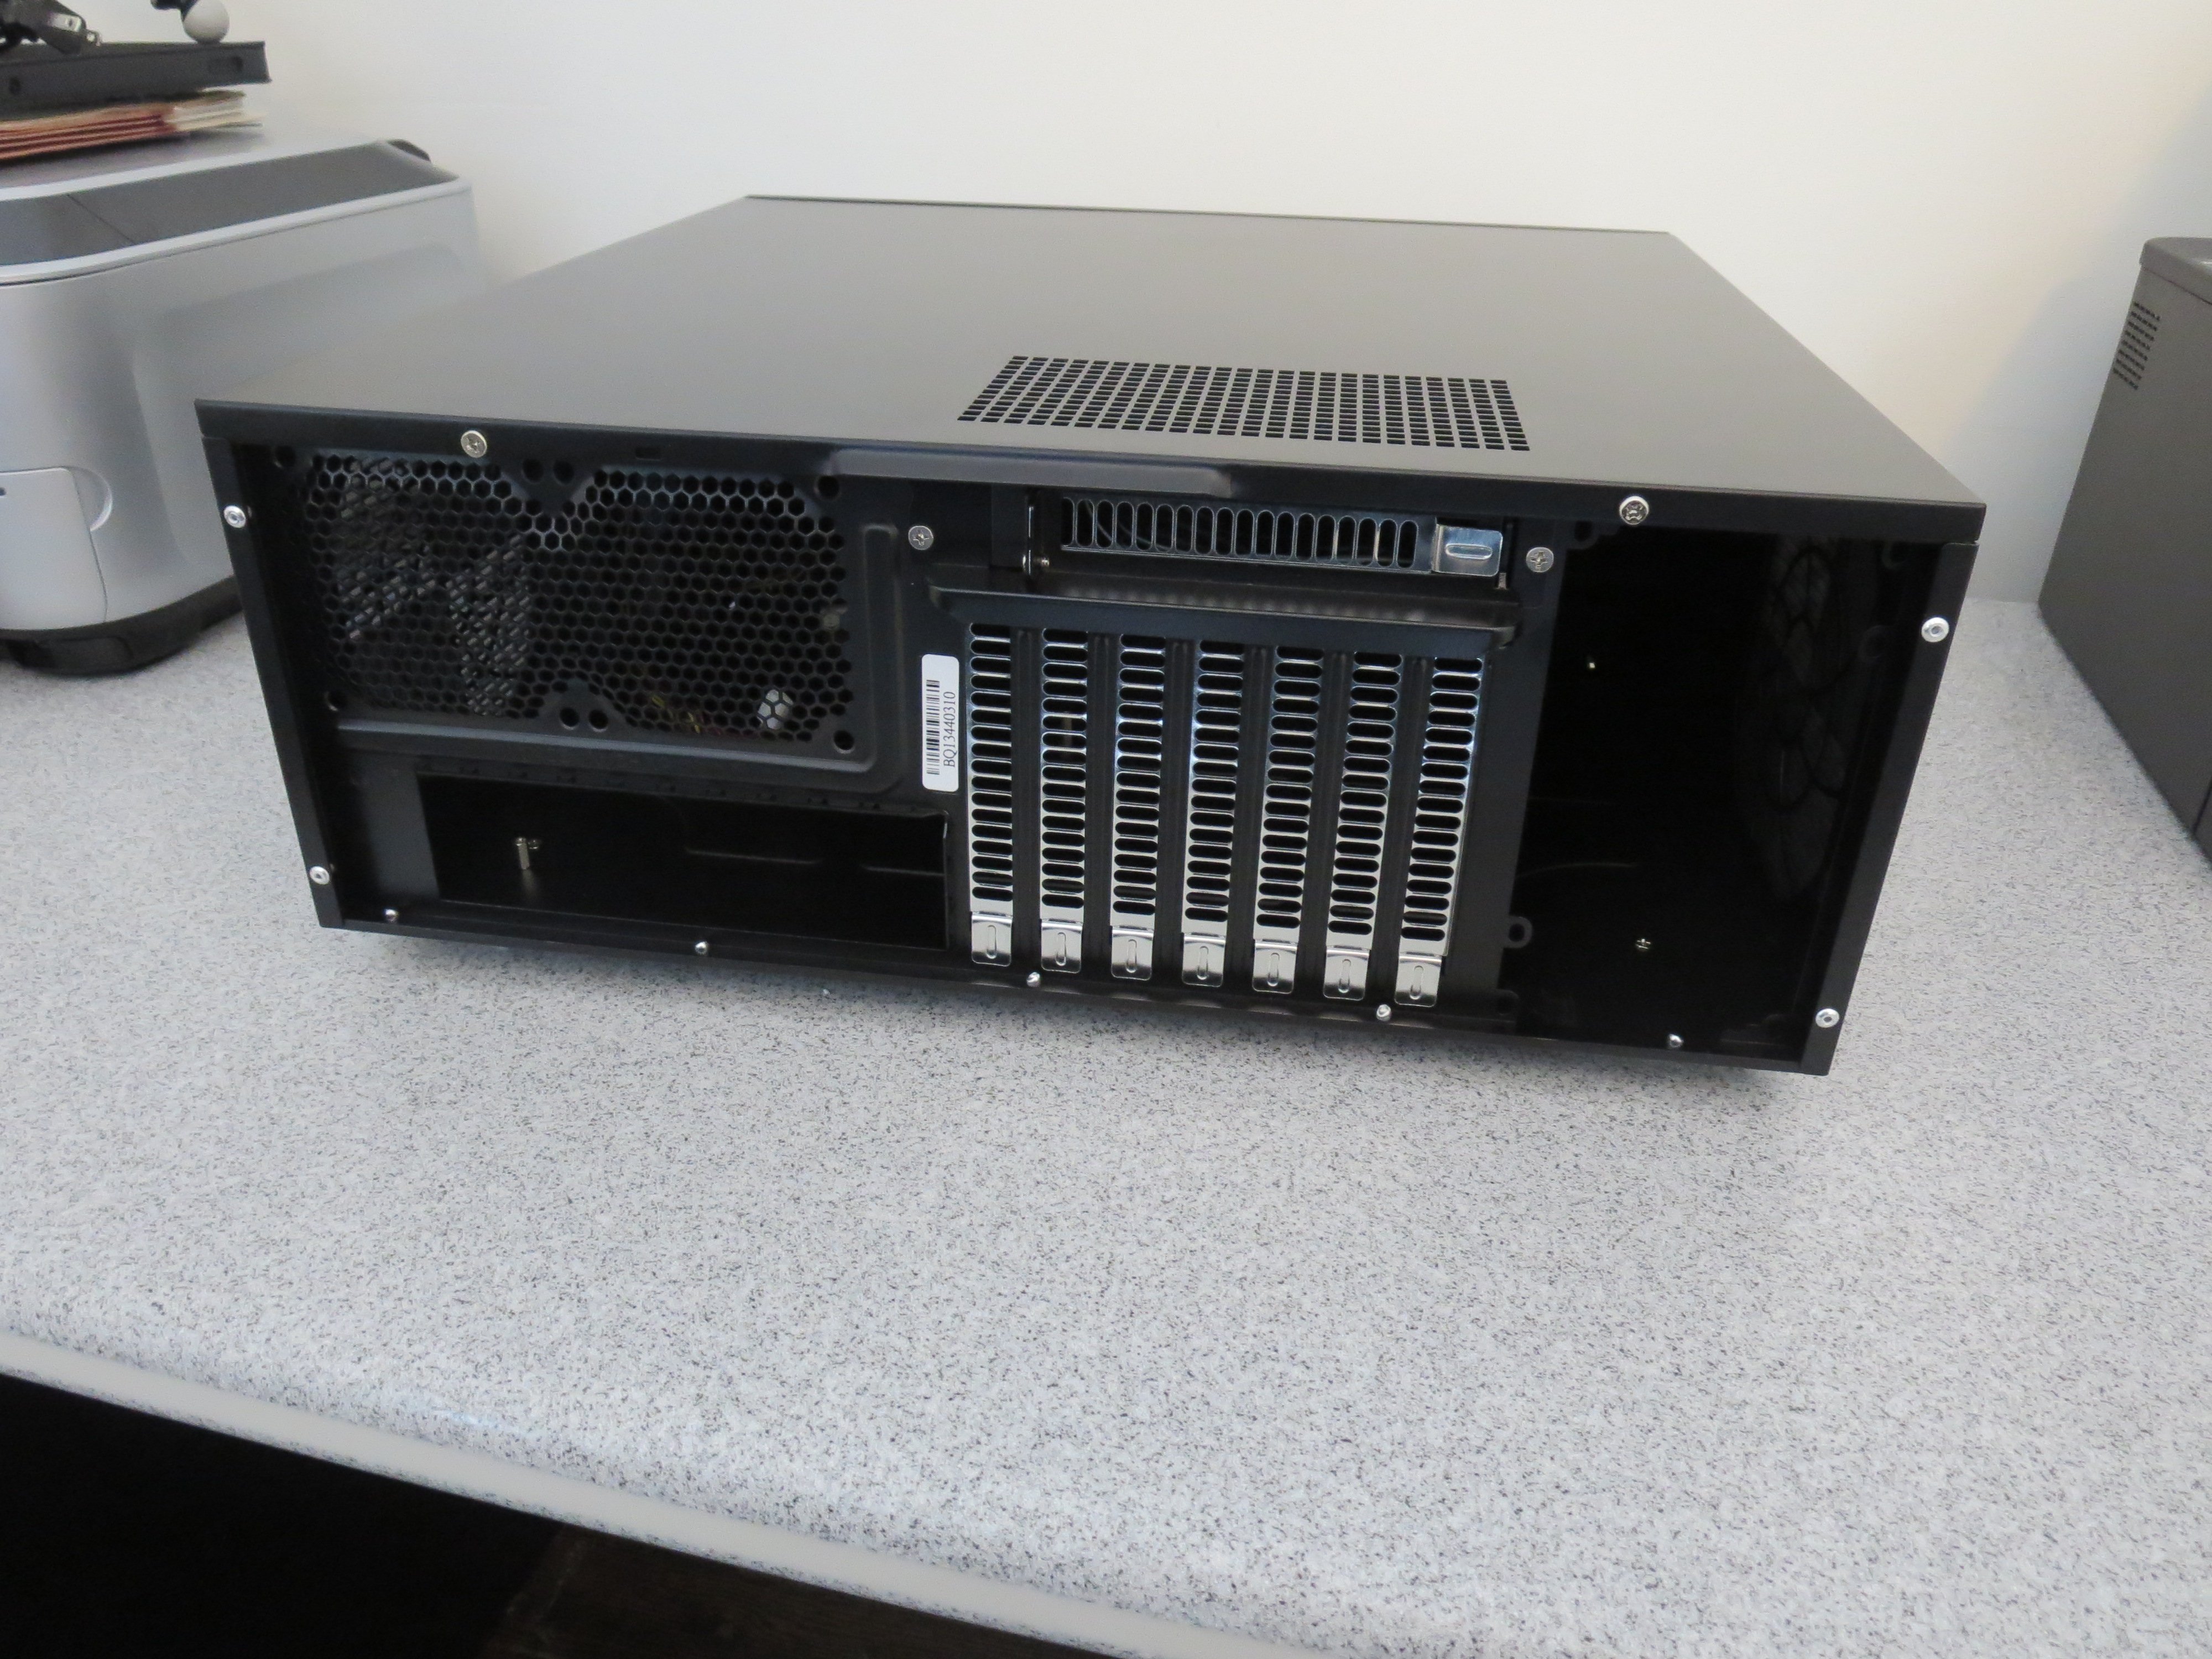
And a shot of the rear of the empty case. No thumbscrews on the removable top lid, but I replaced the factory screws with two thumbscrews I had laying around before completing the build (not seen here).
700


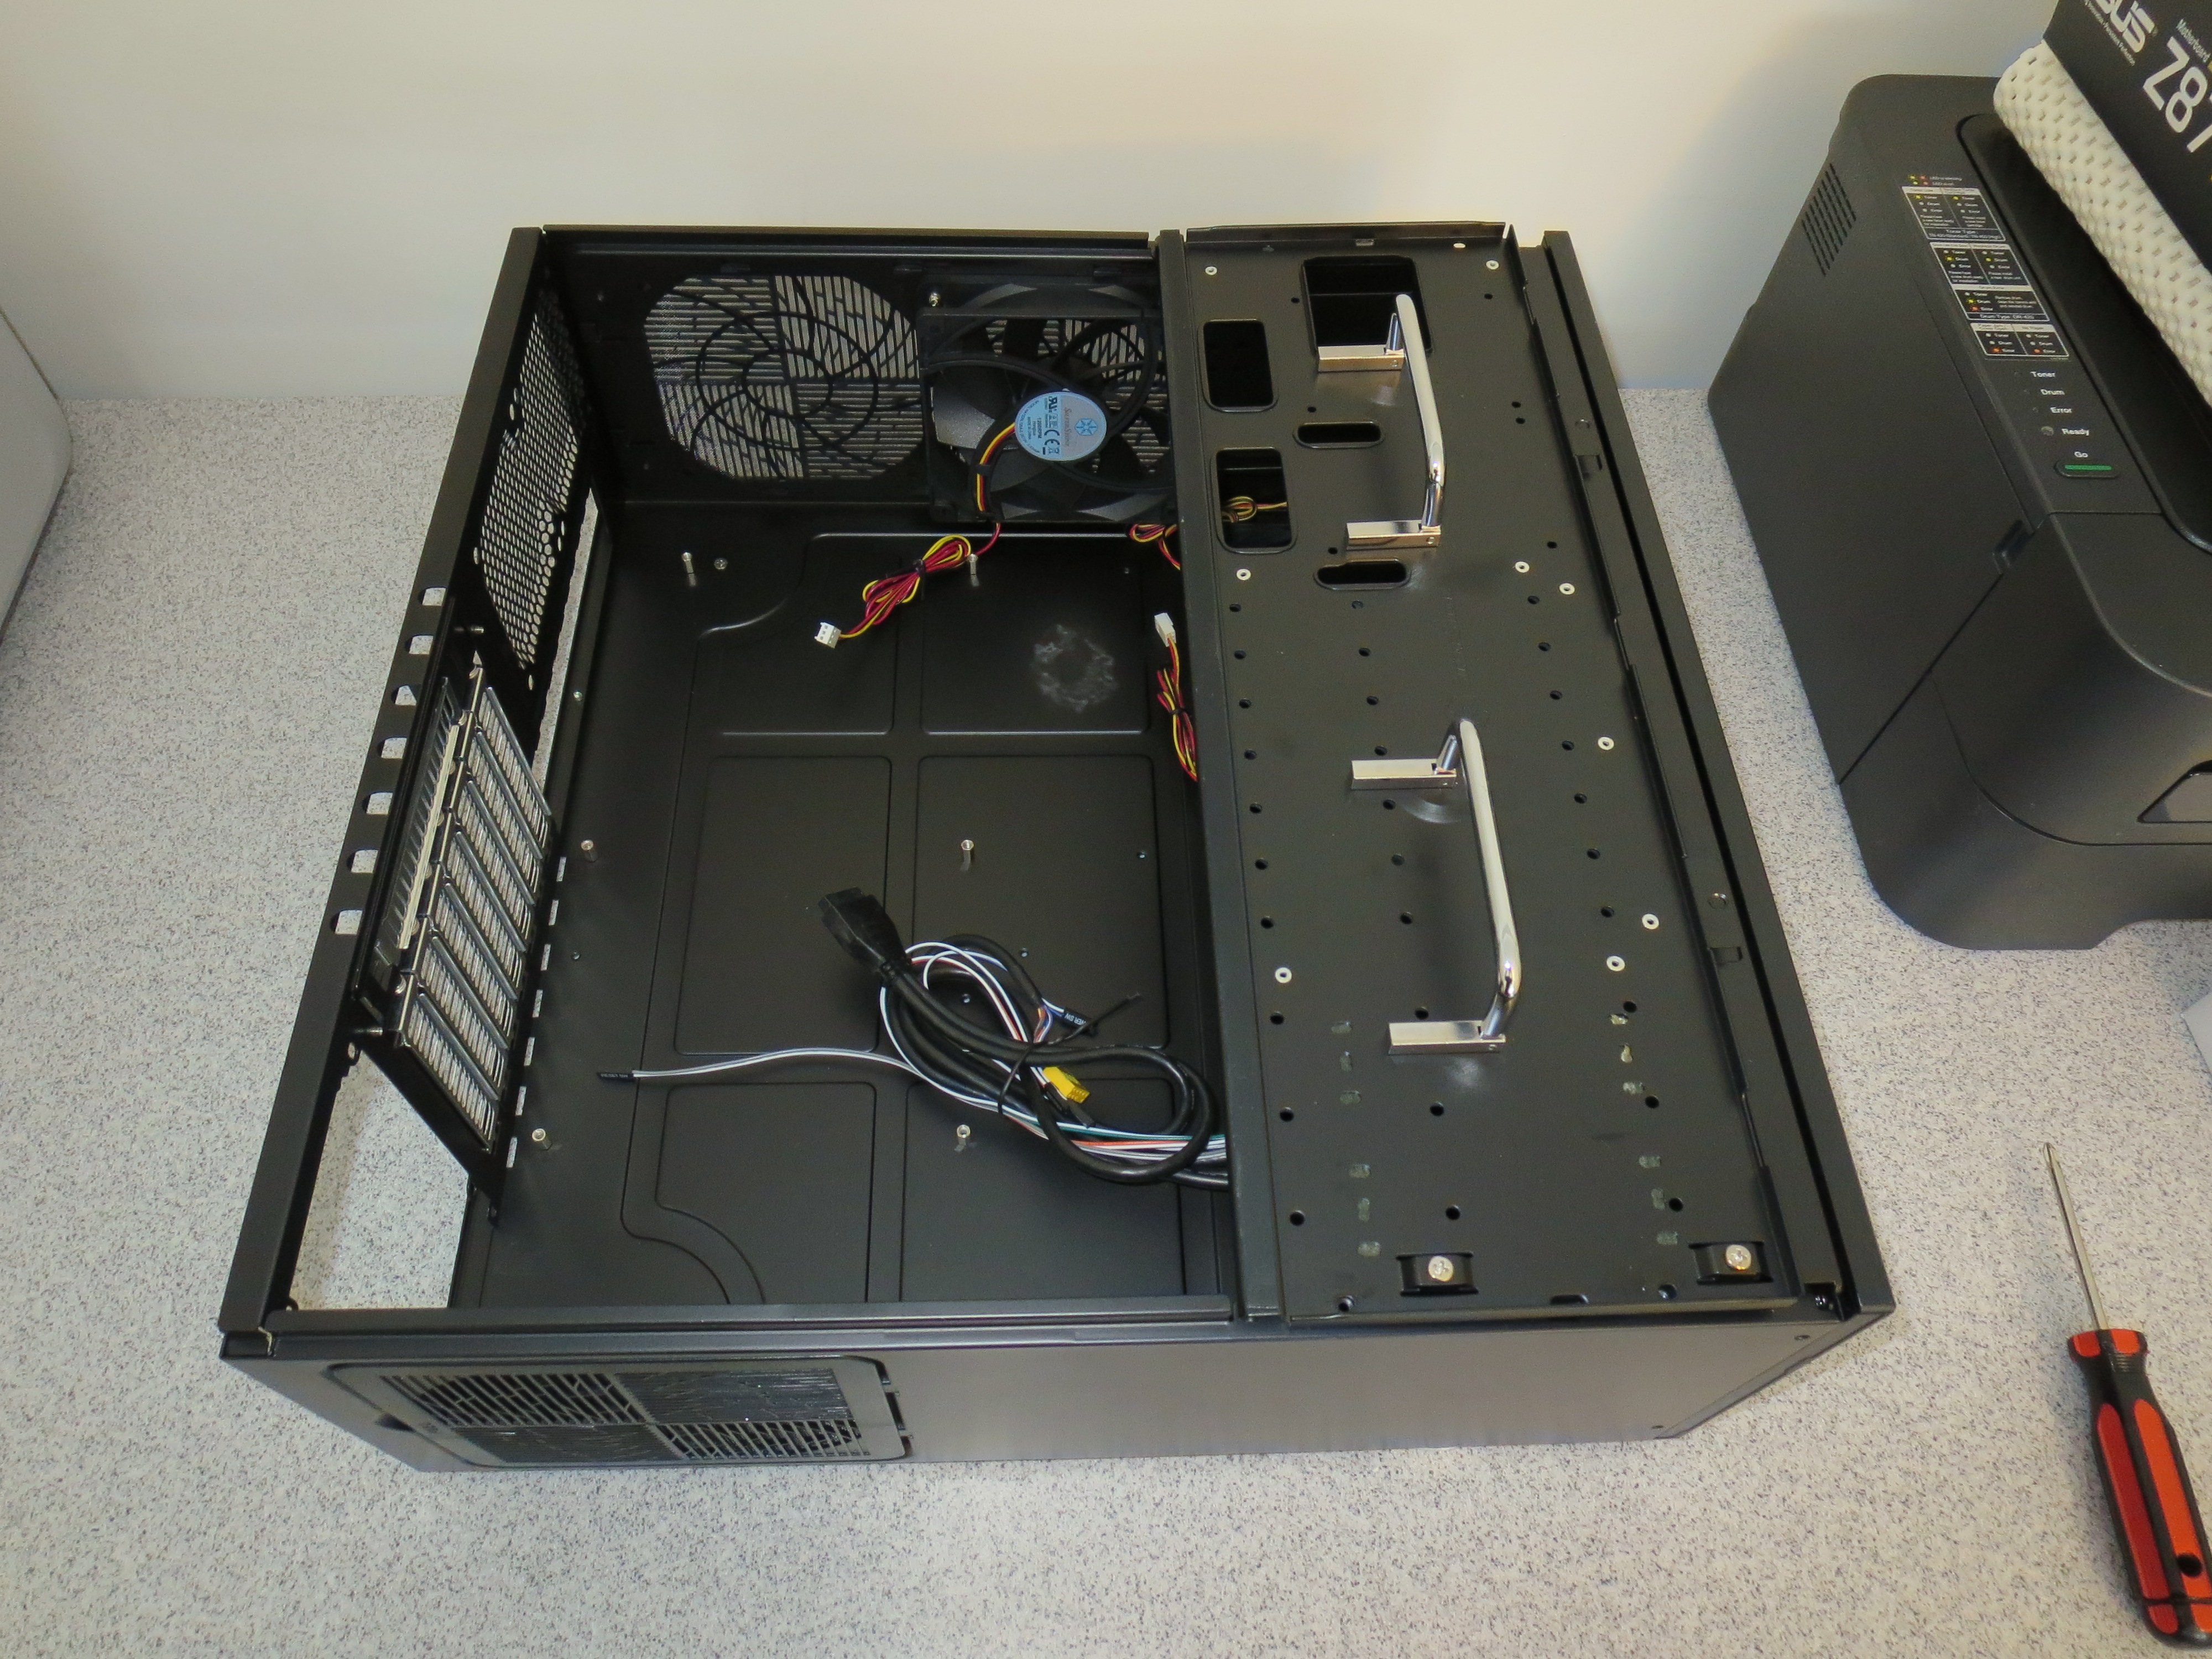
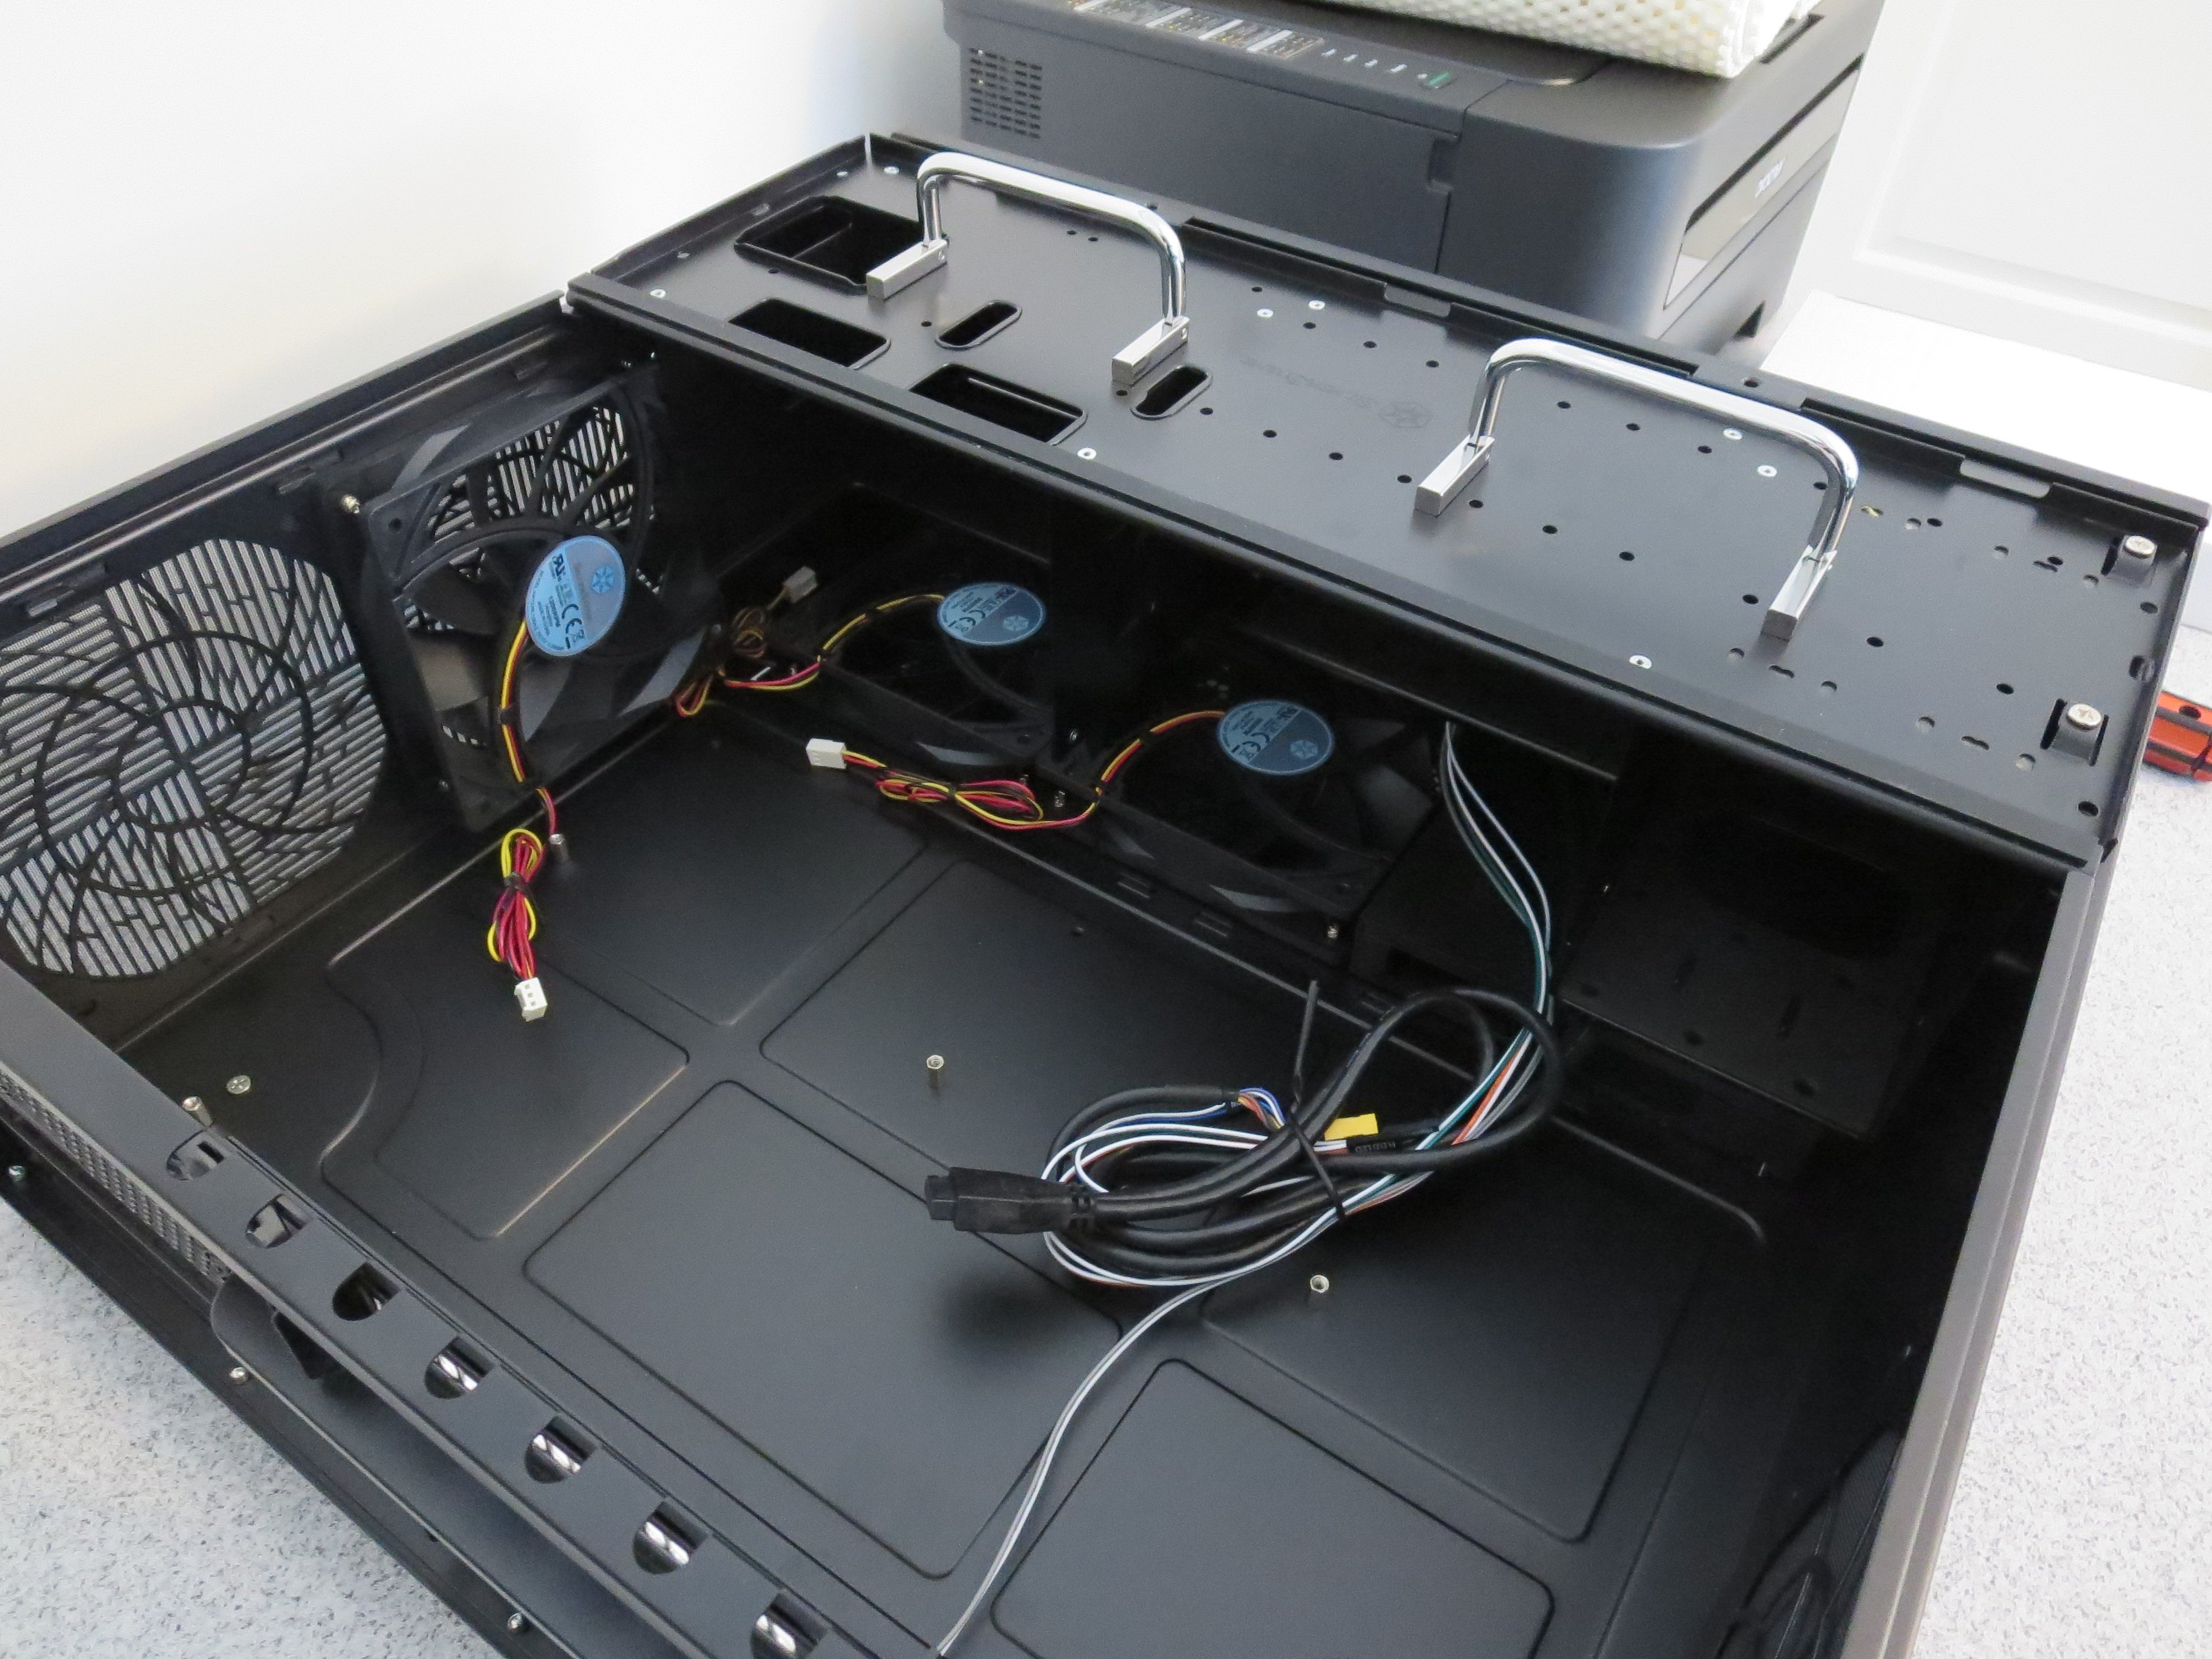
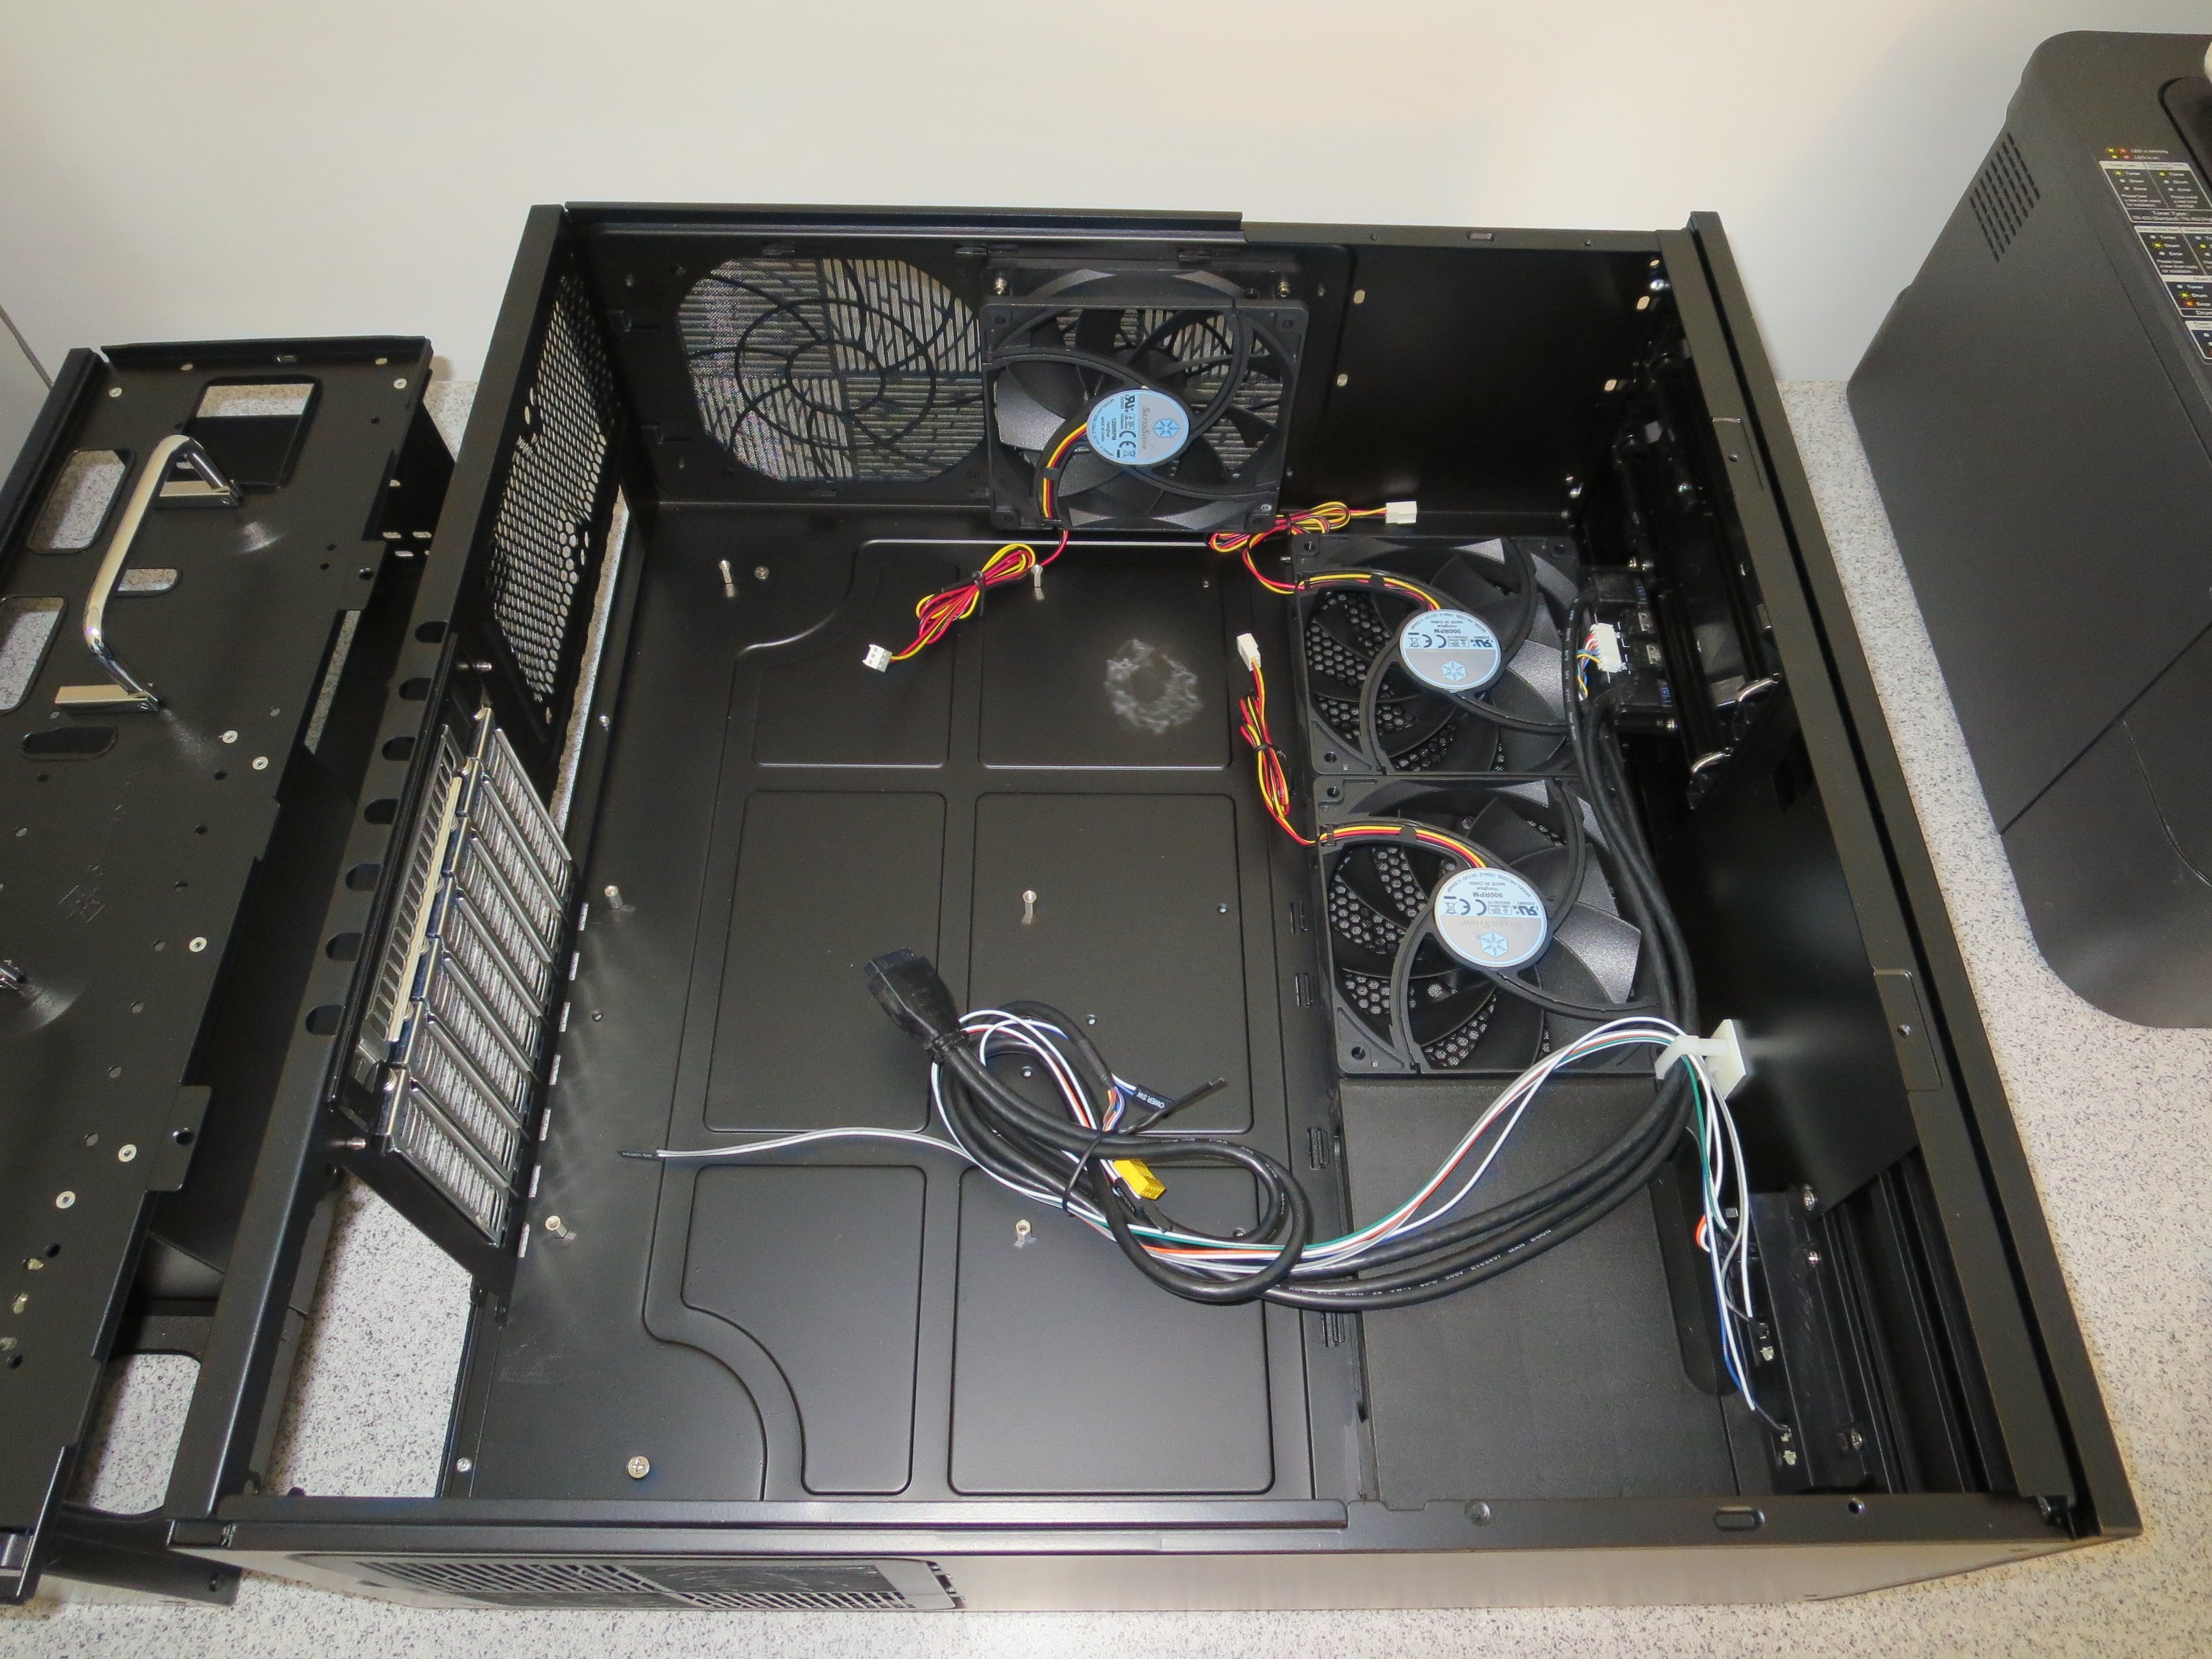
With the lid off, you can see the basic layout inside the case. The drive cage up front can hold eight (!!) 3.5" disks, two optical drives, and at least two 2.5" SSDs (more if you're creative). The entire cage is lined with high-density, anti-vibration foam. Just another quality touch provided by Silverstone. In these pictures you can see the empty case with and without the drive cage installed. In the third picture you can see the cable-management box below the two front fans after the drive cage has been removed.
700

700

700
 
Last edited:

cytoSiN

Platinum Member
Jul 11, 2002
2,262
7
81
PSU installed next. With a case like this, being used for this dual purpose, you really need to consider a modular power supply. You could probably squeeze non-modular cables into the case, but you'd end up with bad airflow. That may be fine for HTPC use alone, but I want this machine to be nice and frosty for gaming sessions.
700

700


With that done, it's time to install the motherboard. I used an Asus Z87 Pro. I could have chosen something with fewer features, but built-in wifi was a needed feature for this build, and I've always like Asus motherboards, so it was an easy choice.
700

700


For the CPU I decided to use an Intel i5 4670K. I probably didn't need the "K," but I've always liked to tinker, and the overclocking flexibility is always nice to have, as I tend to repurpose parts for various builds from time to time. For this build, I did a modest overclock to 4.0GHz, but we'll get to that later.
700


For the operating system and key apps, I'm using an Intel 520 120gb SSD. With prices falling, I almost grabbed a 500gb Samsung 840 EVO, but that's WAY overkill for this purpose, and I had this Intel sitting around unused, so it won the job.
700


I only installed one 500gb HDD (a very reliable Samsung Spinpoint from before the flood) to hold my Steam/Uplay/Origin games, as well as the occasional localized movie when I can't be bothered to stream.
700


You may be asking yourself, "why would he only install ONE hard drive in a case designed to hold LOTS of hard drives?" Quite simply, because I don't need the extra drives IN this machine. My Synology NAS serves up 8TB of goodies everywhere I go (literally, including on my phone, and obviously not just in the house...it's a fantastic product). Also, the extra space to allow those bottom front intake fans to get a lot of air moving (without making a lot of noise from turbulence/obstruction) is great for the gaming aspect of the build.

Speaking of air flow, here's a shot of the Arctic 80mm fans,before and after installation (as rear exhaust fans), along with the installed motherboard (with the CPU cooler's brackets pre-mounted from underneath, of course).
700

700


I can't say enough good things about those Arctic F8s. They're nearly silent, they come with extra cables to daisy chain PWM fans, and I've found them to be very reliable. They're also very inexpensive (under $8 each).
 

cytoSiN

Platinum Member
Jul 11, 2002
2,262
7
81
Next, I installed the RAM. In this case, I installed a pair of 4GB G.Skill sticks. The stock speed (1600MHz) isn't terribly fast, but the stock timings are very tight (8-8-8-24), and since I repurposed these from an old gaming rig, I KNOW that they're stable and cool. I could easily overclock them if I wanted to, possibly as high as 2133MHz, but there's just no reason to in this build. Here's a few shots of the RAM installed (unfortunately, they don't match my color scheme...good thing there's no window in this case!).
700

700

700


Next, it was time to install the CPU cooler. This is often a chore/headache, but I cannot say enough good things about Noctua. I haven't used their products extensively in the past because, despite the fantastic reviews, I really hate their trademark color scheme. That said, I needed a low-profile cooler in this situation, and I wanted something that I KNEW would work well -- set it and forget it, basically. That said, it's hard to find a low-profile CPU cooler for Haswell that can actually support an overclock, even a mild one. But as soon as I unboxed the NH-L12, I knew I had made the right decision. This product screams quality. From the machining to the cable sleeving to the printed materials and extras (including excellent thermal compound and a variety of extension and noise-reduction cables), I was impressed before I installed thing. It was also very easy to intstall. Just unclip the top fan, and the heatfins and bottom fan have holes that go right down to the pre-mounted screws. High quality and ease of installation? Check. And as mentioned above, I was able to daisy chain both 80mm exhaust fans, the adjacent BladeMaster intake fan, and both Noctua fans to run off of the CPU_FAN motherboard header. Awesome! Let's be clear though, those fans are still ugly.
700

700

700

700


Of course, the next question is, did it perform? You bet. Idle temps (at Speedstep's minimum 800MHz) are around 20C, and full load under Prime95 (at my modest OC of 4.0GHz) was around 60C. In my experience, that's fantastic for Haswell, and quite shocking for a low-profile cooler. But I'm getting ahead of myself...we couldn't test temps until we finished the build!

Next step is the GPU. I got this EVGA GTX 760 SC ACX for a great price during a Newegg promotion (plus an EVGA rebate), along with a free copy of AC4, a game I'm looking forward to playing on the big screen. The card looks great, and EVGA was nice enough to throw in a free backplate that is not even advertised on Newegg (what are they thinking?!), but was apparent from the reviews. In this case, in a horizontal case, the backplate isn't really necessary, but it's still a nice feature to have, especially if I ever plan to repurpose this GPU into another build in a standard tower case...and you know I will at some point!
700

700
 

cytoSiN

Platinum Member
Jul 11, 2002
2,262
7
81
Now, once the GPU was installed, and I started to get all the power cords plugged in, we had a bit of the old spaghetti monster rearing its ugly head.
700

700

700


With this case, especially when using these particular parts, forethought is important, and you may notice that I had already plugged in all of the modular power cables I knew that I would need, and had even marked the SATA cables with stickers before I routed them through the cable-management box. This is made it MUCH easier to deal with things once I reinstalled the drive cage.
700

700

700


One extra cable tie right below the GPU to keep the extra power cables neatly bundled (and some gratuitous sticker placement INSIDE the case -- wouldn't want to tarnish that slick brushed-aluminum front and all-black look), and we were nearly there.
700

700

700


I added that extra cable tie for three reasons. First, and by far the least important, it just looks nicer to keep everything bundled -- pointless when there's no window, but still, I guess I'm OCD. Second, bundled in that position, it keeps the cables right in between the dual fans on the ACX cooler, and therefore the cables don't interfere with either fan's intake. Before the bundling, the cables were partially blocking the rear fan. Third and finally, pulling the cables to that point to bundle them kept the vent on the top rear of the case clear, which is important for allowing air to leak out of the vent, which is perfectly placed right above the GPU. Once the cables were arranged, it was time to close the case. Despite the blinding flash, you can see that there are no cables obstructing the top vent.
700
 

cytoSiN

Platinum Member
Jul 11, 2002
2,262
7
81
Here's a shot of the back of the case with everything installed (including the thumbscrews I used to replace the original tiny Phillips-head screws.
700


And some final shots of the build in its place on my media center (with and without annoying flash reflections). Later this year the TV will be mounted on the wall, and the equipment will move to an AV rack (including this rig, which has optional rack ears -- yet another attractive feature), but I think it looks right at home for now.
700

700

700

700


Now, as for benching, I haven't complete everything I'd like to (hence the reserved post below), but here are some potato-camera shots of idle and load specs:
700

700


I'll post some actual screenshots of real testing as soon as possible. In the meantime, I hope you enjoyed reading about the new HTPC/gaming rig as much as I enjoyed building it!
 

cytoSiN

Platinum Member
Jul 11, 2002
2,262
7
81
Spent a couple of hours playing AC4 this afternoon with max graphic settings. CPU temps never climbed above 50. GPU temp spiked at 75 twice, but for under 10 seconds each time. On average, GPU temp was around 64C. Fan profiles kept everything VERY quiet, except during intensive GPU moments (which was infrequent), and I couldn't hear it at all from about 9 feet away on the couch with the AC4 soundtrack/FX playing at about 2/3 reference levels. Still hoping to add some true burn testing results, but wanted to add this for now.

Reserved for benchmarking.
 
Last edited:

Termie

Diamond Member
Aug 17, 2005
7,949
48
91
www.techbuyersguru.com
Hey, looks great! Really goes well on the rack!

By the way, you are quite the collector of game systems. I just sold my PS3 - sad to see it go, but time to move on with my life. ;)

And anyway, once you get a high-powered "Steam Machine" like yours going, you forget all about game consoles!
 

cytoSiN

Platinum Member
Jul 11, 2002
2,262
7
81
Hey, looks great! Really goes well on the rack!

By the way, you are quite the collector of game systems. I just sold my PS3 - sad to see it go, but time to move on with my life. ;)

And anyway, once you get a high-powered "Steam Machine" like yours going, you forget all about game consoles!

Thanks. To be fair though, I still bust out the original gold Zelda cartridge or Mike Tyson's Punch-Out for a trip down memory lane. The funniest part is that I can emulate every NES game ever made using the Windows-CE-based Sega Dreamcast, but it loses something not having that tiny rectangular controller!
 

Charlie98

Diamond Member
Nov 6, 2011
6,292
62
91
Blue RAM? It matches... consider it USB3.0 Blue.

Nice rig... that SS case looks pretty nice!
 

cytoSiN

Platinum Member
Jul 11, 2002
2,262
7
81
Blue RAM? It matches... consider it USB3.0 Blue.

Nice rig... that SS case looks pretty nice!

True! I never thought of that. The case is terrific, really blends well with HT components. Can't wait to get it rack mounted later this year. Of all the components, from a quality standpoint, I'm most impressed with Silverstone and Noctua. I already knew Asus and EVGA made quality parts, but these guys take it to a whole new level.
 

cytoSiN

Platinum Member
Jul 11, 2002
2,262
7
81
What was your cost in this? Just curious. :)

Sorry, I somehow missed this post and only just found my way back here (to my own thread, sad, I know) now. Hard to gauge total cost since I repurposed several parts and have no idea what I spent originally. I would say that all in, including those original PC parts but NONE of the AV gear, about $1000. Probably a few hundred less if you discount those repurposed parts.

Just hung 6th and 7th speakers last week and re-ran Audyssey, and loving every minute of it. Wish I had built this thing sooner!

900x900px-LL-262ee45c_20140413_172049.jpeg
 

cytoSiN

Platinum Member
Jul 11, 2002
2,262
7
81
Also, I should add the following:

Haswell didn't want to play nice with my 5-year-old Corsair HX620w, so I grabbed a Seasonic G550 in mid February and it's humming along just fine for the time being. In short, I was having voltage regulation issues at idle, or at least CPU idle (GPU stress with CPU closer to idle was still an issue, for example when watching a movie or playing a game). I'd basically get a full shut down followed by inability to boot without first unplugging and doing a static discharge. Issues with older PSUs (especially with multiple 12v rails) and Haswell have been well documented, but I guess I hoped I could just work around it. This swap seems to have cured the issue entirely (thanks to Termie for the recommendation), but hopefully others can learn from this and make sure they pair PSUs and CPUs to avoid generational gaps like the one reported with Haswell and seemingly exposed here.

700

700
 

ZackNeedsHugs

Junior Member
Apr 18, 2014
2
0
0
This was an excellent post! I'm researching my first build, a hybrid HTPC/Gaming rig around $1000-1200; this working example is far & away a better build than any I've priced or sought advice for. I approximated your build, with a few alterations since all of my components would have to be new (underlined below). The cost of the build is workable for me, but if I can tweak it down without compromising parts compatibility & performance than all the better. This all leads me to a few questions...

1) I currently have minimal need for media storage, and prioritize quick startup & response. Is it worth the expense to go with a larger SSD (~500gb?), or to save money by decreasing/removing the HDD?

2) You repurposed old memory. I had no methodoloy for my selection, except to emulate your choice. Is there a better option that maximizes value w/ strong performance?

3) Future upgrades for my rig may include a tv-tuner, memory, or a new or additional video card. Is the cooling setup and total build conducive to these upgrades?

4) Any general cost savings recommendations?

Thanks in advance for any insight, I'm quite appreciative of the work you've done.
-Zack


PCPartPicker part list: http://pcpartpicker.com/p/3vHba
Price breakdown by merchant: http://pcpartpicker.com/p/3vHba/by_merchant/
Benchmarks: http://pcpartpicker.com/p/3vHba/benchmarks/

CPU: Intel Core i5-4670K 3.4GHz Quad-Core Processor ($209.99 @ Amazon)
CPU Cooler: Noctua NH-L12 37.8 CFM CPU Cooler ($46.25 @ NCIX US)
CPU Cooler: Corsair H55 57.0 CFM Liquid CPU Cooler ($54.99 @ Amazon)
Motherboard: Asus Z87-Pro ATX LGA1150 Motherboard ($166.99 @ Newegg)
Memory: G.Skill Ripjaws X Series 8GB (2 x 4GB) DDR3-1600 Memory ($74.99 @ Newegg)
Storage: Samsung 840 EVO 250GB 2.5" Solid State Disk ($153.95 @ Newegg)
Storage: Samsung Spinpoint F3 1TB 3.5" 7200RPM Internal Hard Drive ($104.98 @ Amazon)

Video Card: EVGA GeForce GTX 760 2GB Video Card ($259.99 @ NCIX US)
Case: Silverstone GD08B (Black) HTPC Case ($148.98 @ SuperBiiz)
Power Supply: SeaSonic S12G 550W 80+ Gold Certified ATX Power Supply ($77.99 @ Mwave)
Optical Drive: Pioneer BDR-209DBK Blu-Ray/DVD/CD Writer ($59.99 @ Micro Center)
Case Fan: Cooler Master Blade Master 76.8 CFM 120mm Fan ($7.28 @ NCIX US)
Case Fan: Arctic Cooling Arctic F8 31.0 CFM 80mm Fan ($5.84 @ OutletPC)
Total: $1378.05
(Prices include shipping, taxes, and discounts when available.)
(Generated by PCPartPicker 2014-04-21 09:49 EDT-0400)
 

cytoSiN

Platinum Member
Jul 11, 2002
2,262
7
81
1) I currently have minimal need for media storage, and prioritize quick startup & response. Is it worth the expense to go with a larger SSD (~500gb?), or to save money by decreasing/removing the HDD?

2) You repurposed old memory. I had no methodoloy for my selection, except to emulate your choice. Is there a better option that maximizes value w/ strong performance?

3) Future upgrades for my rig may include a tv-tuner, memory, or a new or additional video card. Is the cooling setup and total build conducive to these upgrades?

4) Any general cost savings recommendations?

Thanks in advance for any insight, I'm quite appreciative of the work you've done.
-Zack

Thanks, glad you found it helpful.

1) I think a 250GB ssd is more than enough with a separate HDD. If you're planning to use ONLY the SSD, than bigger is better, especially with the size of many of today's games, even from Steam, etc.

2) That memory is, in my opinion, a very strong choice. The Samsung magic RAM would be better, but it's not available like it used to be. You many be able to find something a little cheaper, but in my experience, that GSkill kit is great because it's very stable at incredibly tight timings by today's standards. It's not as fast as 2133 RAM, but you lose timings at those speeds, and you really won't see a bottle neck in the RAM (in my opinion, others may disagree), with this setup.

3) This all depends on how cleanly you build inside the GD08. If you know what you're doing and you're very careful with clip ties and the like, you can easily get two video cards and at least one peripheral card into this case. It will be a tight squeeze though, so be prepared for that.

4) You can save money on CPU/motherboard if you live near a Microcenter (check their website for combo deals, which are available in stores only afaik). You may also want to post your build in the "general hardware" forum to get comments on matching components and possibly finding better deals. Also, you should check the "hot deals" forum here and other sites like SlickDeals to make sure you get the best bargains available on the day you purchase.

I also recommend the Tech Buyer's Guru for additional advice (for example, this page may be helpful: http://www.techbuyersguru.com/HTPCbuild.php).

Good luck!