Okay...so I just found out that SkyDrive won't let people download large files from my PUBLIC folder without signing in with a Windows Live account.
So now I'm uploading all those files to my GoogleDrive....which I am assuming will allow me to post download links without requiring the downloaders to have a Google ID.
At any rate, if it doesn't, you can always create a bogus account at either place and get download access.
")
File downloads for Windows SkyDrive
https://skydrive.live.com/redir?resid=72FA07C8E8C44F50!105
I'll post my GoogleDrive link when the uploads are finished for you Google ID users.
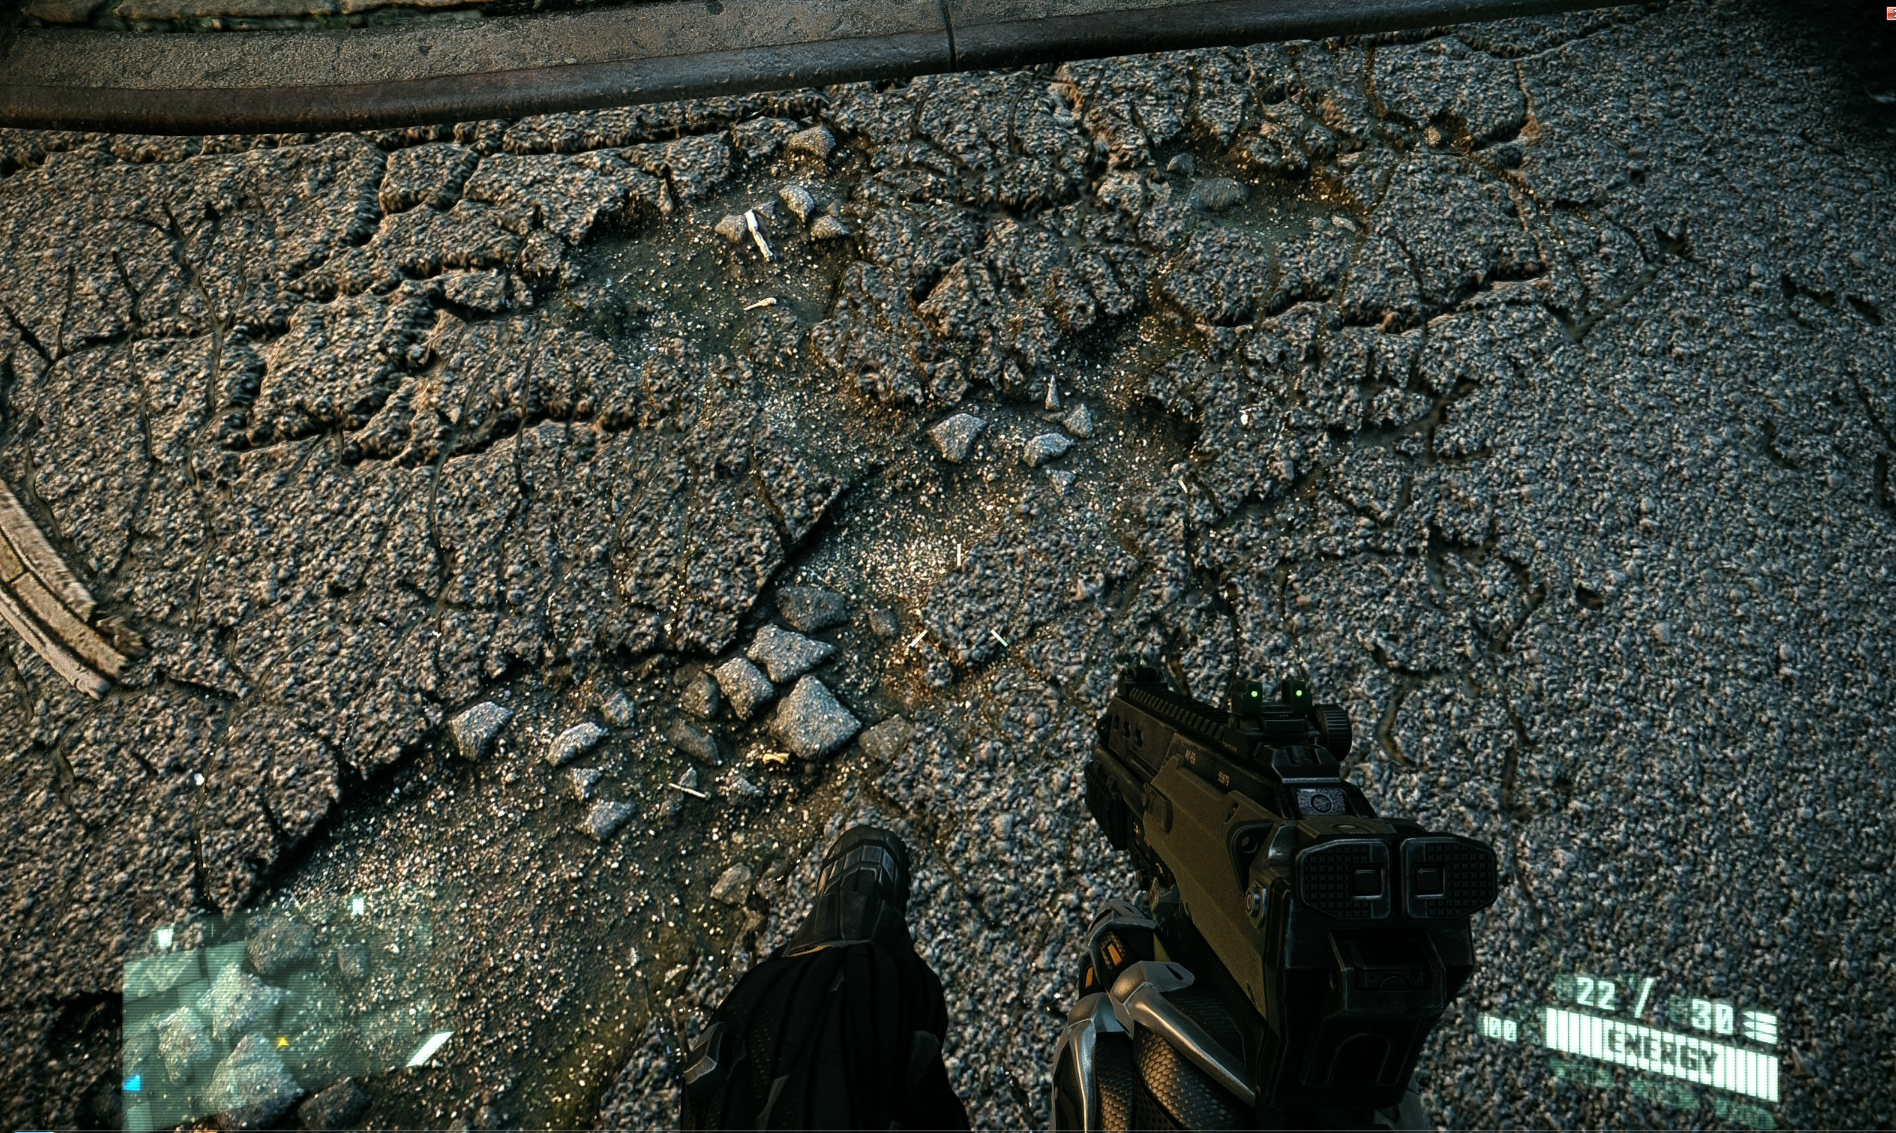
My personal Crysis config:
Do a fresh install of Crysis. If you're running STEAM, it will be patched to the appropriate version. If not, you'll need to install patch 1.2 and 1.2.1 before you touch anything.
STEP 1
Go into your
...Crysis/Game/Localized folder and delete these files. They're all of the annoying screens / vids that play before the game starts. Delete these and it will just load straight to the game menu.
STEP 2
Start the game and jump into a level. You don't have to start a new game to do this. Just hit the tilde key (~) which will bring up the console. Type
map mine and this will load up the mine level. Once it loads up, quit the game.
STEP 3
You should have all of these files downloaded.
Copy and paste the highlighted .pak files into the
....Crysis/Game directory (you'll notice I didn't highlight the GlobalAmbientLighting .pak...don't copy this one over yet). These are the improved texture / objects files. Your directory should like like this now:
*NOTE* I have included the particle FX mod (XtremeFX2.pak), but this is a VERY INTENSIVE file that will suck your FPS, so don't include it unless you have a very high-end machine. If you include it and your FPS is too low, this is the first file you should delete!!
After copying them into the directory, repeat STEP 2.
STEP 4
Time for the GlobalAmbientPOM/AF mod. This one is very important!
Copy the .pak file into the same directory you just placed the other .pak files in. Now
delete the
ShaderCache.pak file and then go into ....Documents/MyGames/Crysis and delete the
Shaders folder. This will cause the shaders to recompile.
Now repeat STEP 2 again. *Note* When you load up a level this time, it will be all blank and weird for a bit while the shaders reload, so don't freak out.
STEP 5
This is optional, but I highly recommend it. The Tactical Expansion mod adds more realistic gun handling, hit damage (no more bullet-soaking NPC's), and a lot of extra weapons and attachments. It also increases AI awareness and accuracy. You will need to start your new game on "DELTA" difficulty to utilize the mod. The only thing I don't care for is the weapon sounds, but I'm so happy with the improvement that I can look past it.
This one is simple - - just run the installer.
To run the mod you will need to create a shortcut to the Crysis.exe in the
...Crysis/Bin32 folder (right click and then "Send To" , then "Desktop (create shortcut)" ).
Right-click the newly added shortcut on your desktop and add
-MOD Tactical-Expansion to the end of the target line.
Launch your game from this shortcut. If it loads properly, you'll see "Tactical Expansion Mod" in the right-hand corner of the Crysis Menu screen. DO NOT LOAD BY CLICKING THE MOD FOLDER IN THE CRYSIS MENU....IT WILL NOT LOAD CORRECTLY. You must use your custom shortcut.
STEP 6
Install the CUDAAT ToD mod. It is important to install this last, so the other mods don't override the settings (some of them will, and then it won't work).
Easy....just run the installer.
One more last little modification to get rid of that AWFUL Crysis hit-indicator sound.
Go into your
...Crysis/ directory and open the "autoexec.cfg" file in notepad. Add the line I have highlighted to it and save the file.
For those of you unfamiliar with the autoexec.cfg file, it is just a script that runs before you load a level in the game (console commands). You can modify any of these values to suit your preference. Google is your friend...I'm not going to go through what they all do.
One last note: For best framerates, turn the Crysis Menu setting for AA
OFF. The custom autoexec.cfg file runs a console command to use EdgeAA 2x. This generally looks good and runs much, much better than the AA used in the Crysis Menu. If you decide to use the menu AA, it will override the console command.