• We’re currently investigating an issue related to the forum theme and styling that is impacting page layout and visual formatting. The problem has been identified, and we are actively working on a resolution. There is no impact to user data or functionality, this is strictly a front-end display issue. We’ll post an update once the fix has been deployed. Thanks for your patience while we get this sorted.

Project - Rebuilding Nadeshiko.

aigomorla

CPU, Cases&Cooling Mod PC Gaming Mod Elite Member
Super Moderator
As some of you are aware, i have undergone a massive rebuild on my main system.

Nadeshiko is composed of 2 subsections.

Futon is my Rad Chamber. -Wind
It will hold all my rads and bulk fans.

The Sepcs for Futon is as follows:
Radiators:
MCR320 x 2
PA160
PA120.3

Fans:
Tribewerk on the PA intake.
Silverstone AP18 on the PA160
SanAce for the MCR320 stack.

Possibly a few yates here and there to even distribution of air flow.
The way the unit will be fan'd serial.. meaning..
CPU PA120.3 -> GPU PA160 -> MCR320 Stack -> out the rear.
100% of my Water -> Air transfer will occur in Futon.

Mizu -Water holds everything else:

Specs:
Intel i7 990X
eVGA Classified E758
Nvidia 580GTX
(debating if i should drop in the second i have... but dont have water block yet tho.)
Nvidia 250GTS - physics / 3rd monitor card.
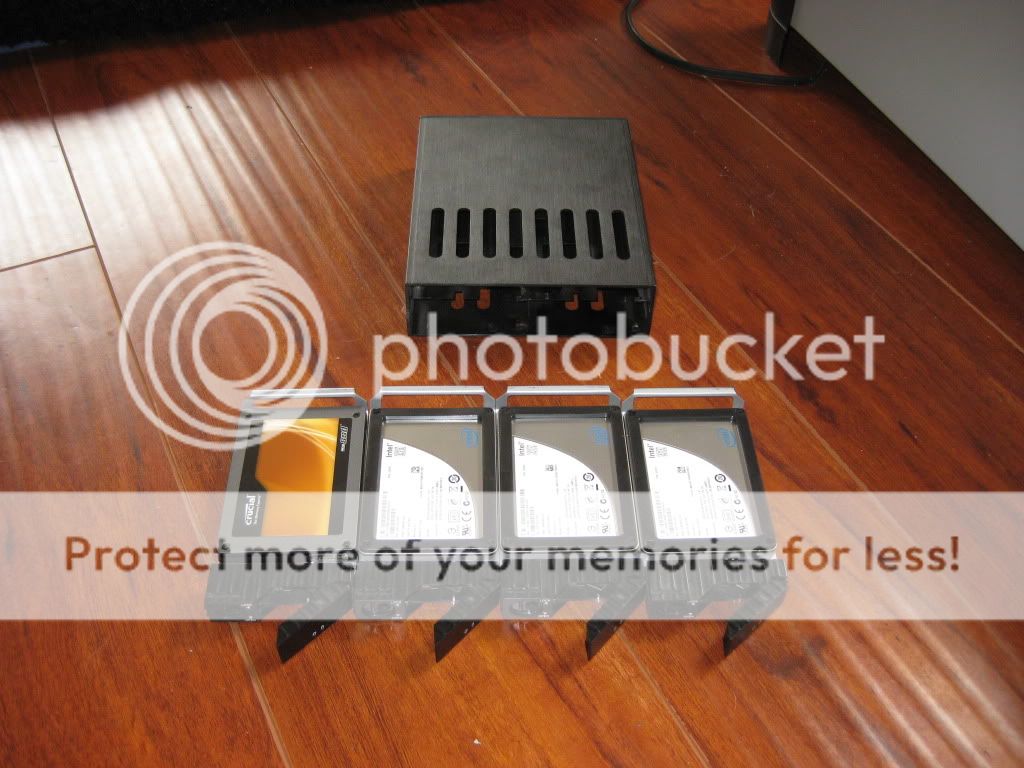
3 x 40Gig Intel SSD in Raid 0
1 x 256gig Crucial C300 -> D:\Program Files\ <--- all my games go there. 😛

Display:
ASUS 27inch LED monitor -> Center
Gateway 24inch S-PVA's @ 1920x1200 in portrait.

Input devices:
Logitech G19 <-- i am a sucker for LCD bling... :shakes:
Logitech G13
Logitech G500

What can i say? i love logitech...

She will be a TriLoop System.
CPU -> PA120.3 - Dual DDC
GPU -> MCR320 x 2 -> Dual DDC
Board -> LOL... debating on dual DDC again... or dual D5's.

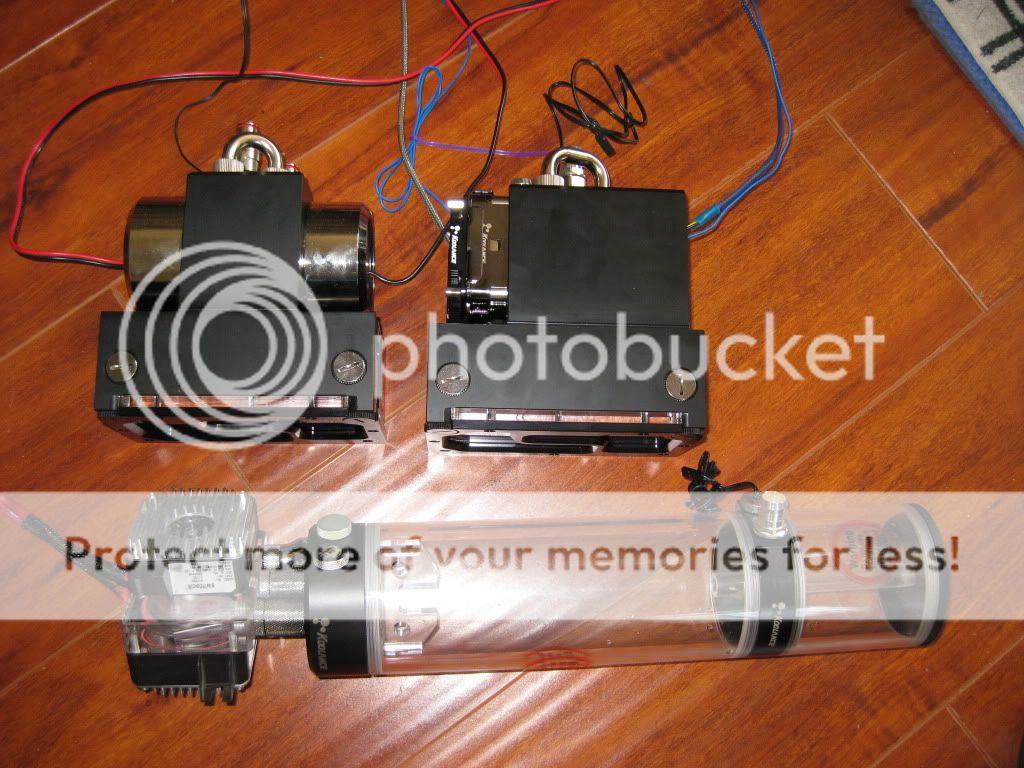
Either 1 or both koolance bay res's + Koolance tube Res.

Tear down should start tomorrow should time permit.
I'll come in with part shots in the next post.

I have Delayed Making this post a bit, so i can allow this one to be more fluid on build.

If you want to see everything the start of my project is here:
http://www.xtremesystems.org/forums/showthread.php?t=269204
 
Parts Spaming~ Everyone loves pictures no?

Basically here is where i am starting from:
IMG_0743.jpg


Yes i am the DUST KING! well on XS they want me to go from a ziptie diety.. to a dust devil.. :X

I litterally had to take the case out.. strip it, and spray it down with a hose + brush:
IMG_0751.jpg


More cleaning:
IMG_0752.jpg


And i finally got my black back! lol...
IMG_0761.jpg


As you can see this was the color b4:
IMG_0746.jpg


LOL...

Stripping the case my core parts:
IMG_0745.jpg


IMG_0601.jpg


And here are the radiators which came out of the case:
IMG_0755.jpg


UGH... Clean clean clean!
IMG_0758.jpg


Much better :biggrin:
 
My rads will be mounted in this type of stack:
IMG_0763.jpg


IMG_0764.jpg


A Collection of the 2 bay res's going into my system:
IMG_0768.jpg


Well if they say mods' have a ban hammer, this is my water hammer!
IMG_0771.jpg


Hard piped.. dual inlet single outlet DDC-2's:
IMG_0772.jpg


All the res's and pump's going into my rebuild:
IMG_0777.jpg
 
Working on the radiators... i finished the MCR320 stack i use:
IMG_0775.jpg


Its a MCR320 - 25mm Shroud - 38mm San Ace - 25mm Shroud - MCR320:
IMG_0776.jpg


Here is another collection of all the Rad's Futon will house:
IMG_0774.jpg


And Hard mounted:
IMG_0778.jpg


IMG_0779.jpg


My tube res' i intend to possition like this:
IMG_0780.jpg
 
This next post will catch u up with the one in XS.

I am tubing up all 3 loops, and have completed 2/3.
The bay res's i ran into problems with bleeding.
They werent the dream easy application i thought they were.

Here u can see me calibrating my sensors.. making sure they arent too far from each other.
It shows uneven, but they took turns being .3C higher then each other... so i can say they are fairly accurate to each other.
IMG_0735.jpg


Or maybe i am just too used to tube res's.

However, i changed the hard pipe i originally had to something a bit more flexable.
IMG_0754.jpg


And here u see the basic layout starting to take shape:
IMG_0782.jpg


This is no where near done... i have not organized cabling yet... and i miss my firefox spellcheck! :X
IMG_0781.jpg


The reason of my delay:
IMG_0783.jpg


i got another one to fight now.. 😛

This is my temp station.. yes.. its on air.. 😛
2600K on a M4E...
IMG_0702.jpg
 
Last edited:
Aigo, it is so clean now...that case got a full service wash. I am also in love with that WC hammer you have going on.

I cannot believe that 2600k is still on air. I am thinking about getting a second 2600k with an M4E and putting it under water with 2 gtx 580s in a MM Ext. Ascension. However, I am thinking of just waiting for socket 2011 to get a new computer and case.

And now back to the build, how are you liking the two bay res.? I read how you planned to fix it, but am wondering your opinion since mine seems to be an odd one out with the O-rings and oil problem.
 
its a painful at best res.

And i say painful because its hard to bleed properly.

I have been figuring out a way to bleed it, but i threw in the towel after i figured out, in application and in testing, the res behaves quite differently.

Example.. a friend told me its not easy to bleed.
But to me not easy, means... oh its not truely meant for the beginner without some help.

Forgot... my scale is way off.. he meant its not easy for me included to bleed.

So its a tough little res.

Final loop setup, b4 i start cable management.
IMG_0784.jpg


IMG_0785.jpg


LOL and yes i need to peal those warning stickers off my res, and i need to pull that rear line behind so the red comes out.
 
Last edited:
geez T! the dust! Those ain't bunnies no more!:twisted:


:whiste:,,,,


My pc is just as bad, I've got two fans that have so much dust they won't start up.😱😱😱
 
geez T! the dust! Those ain't bunnies no more!:twisted:


:whiste:,,,,


My pc is just as bad, I've got two fans that have so much dust they won't start up.😱😱😱

lolol...

i had to chug a few because they went bad from too much dust.

A zalman i used to have clicks now... its in the trash.
 
So many wires for that tri-loop set up Aigo. I can only imagine the amount of molex/fan connections going on after "cable management".:awe:
 
So many wires for that tri-loop set up Aigo. I can only imagine the amount of molex/fan connections going on after "cable management".:awe:

if u think thats bad...

Heres the parts all over the floor.

IMG_0770.jpg


IMG_0737.jpg


lol... i had so little room to work inside, i had to build outside and bring it back inside.
 
Shame to hear that the Koolance bay res is giving you trouble. I wonder if perhaps dual bays just isn't enough room for two D5s and a res that bleeds properly.

I'll be interested to see how this build turns out. :thumbsup:
 
Shame to hear that the Koolance bay res is giving you trouble. I wonder if perhaps dual bays just isn't enough room for two D5s and a res that bleeds properly.

I'll be interested to see how this build turns out. :thumbsup:

Well im hoping for a quick fix from koolance.

Anyhow i slipped tubing over that melvin tube.
Messing around with aesthetics at the moment:

IMG_0787.jpg


might need to replace that clamp also :\

What u guys think? pull the tubing off? or leave it?
 
I would probably remove it just because I think it is too different from most of the case. It also looks like the cut was off axis (could be the refraction of the water though).
 
I would probably remove it just because I think it is too different from most of the case. It also looks like the cut was off axis (could be the refraction of the water though).

i used tube cutters to cut it.

its a water and the curved class.

Also had to boil it out first to make it soft so it would go over...
 
Well im hoping for a quick fix from koolance.

Like another revision or a fix to existing units?

might need to replace that clamp also :\

What u guys think? pull the tubing off? or leave it?

yeah, is that rust on that clamp?

I'd take the tubing out. That is a bug, cool looking res, and personally like the look of the clear water in motion. Kinda peaceful in a way.
 
Yeah inside my system everything which was made out of steel rusted.

lol... this is why i am going with annodized screws during this build.
I put an order at fastner's express, so it should arrive soon.

Anyhow... updates.. as i said if u want a day by day update, you can follow the thread @ XS. This location i will do it in bulk, so its more fluid.

I was running into problems with filters... Initially i thought of something like this:
IMG_0795.jpg


Then i realized.. no amount of filters will save me.
So i realized i had to take a side tour and build a dust collection box.

I came up with this invention: (that hole is taped up BTW... so its sealed)
IMG_0799.jpg


Basically a USPS box.. with a central AC filter on it:
IMG_0800.jpg


This unit makes filter changes quick... and most importantly VERY CHEAP.

And b4 u guys shoot me on my ghetto dust box.. trust me.. i have all types of air purifiers one can possibly experiment with:

Ionic:
IMG_0802.jpg


And a multi stager:
IMG_0801.jpg


Ionics suck... straight up.. not great for dust collection, but great at hiding smell.

The multi stage unit was getting too costly to maintain, as i leave my windows open all the time, and filter changes became quite frequent.

This guy, the filters cost 1.90 each, and i can use them twice by changing direction, so its a win for me.


Anyhow, the system looped up, although its not completed yet... i got a 2nd 580gtx block coming soon, so it will have another 580gtx in it next week.
IMG_0803.jpg


My front bay:
IMG_0806.jpg


The Rad chamber:
IMG_0808.jpg


The values inside the radiators themselves:
IMG_0809.jpg


As u can see, there is litterally sensors all over my system. 😛
 
Last edited:
And the backside:
IMG_0807.jpg


More to come as my last order of parts arrive next week.

🙂
 
So blingy screws anyone? 😀

IMG_0810.jpg


you can get them at Fastner's Express:
http://www.fastener-express.com/

They look like this:
IMG_0813.jpg


I am going to use mostly the purple ones for my motherboard.
The red ones goes to my 2600K.

The Black with Purple rings are to do this:
IMG_0819.jpg


Needed to replace all my rusting steel screws:
IMG_0817.jpg


Also going to change out the front panel like so:
IMG_0814.jpg


Tomorrow the last order of parts will arrive.

Oh this is how i follow forums BTW:
IMG_0619.jpg


as u get older, it seems wide screens becomes portraits, as u get more work done on portrait then widescreen... :\

Thank you for following. 😀
 
Last edited:
Looking very nice compared to the dust ball it was before. I cannot wait to get my behemoth TH10 from Jim in the next week.

Also I want another monitor to get setup like you are. Would afford an extra forum like you have instead of going through tabs.
 
Looking very nice compared to the dust ball it was before. I cannot wait to get my behemoth TH10 from Jim in the next week.

Also I want another monitor to get setup like you are. Would afford an extra forum like you have instead of going through tabs.

i end up doing more forum browsing / news reading / web site browsing, then i do gaming / watching movies.

Felt in the config i have, if i want wide screen i can do it in the center, and with full SLI on top.

If i want to go on forums and browse the web, or do productive stuff on office, it doesn't get better then portrait.

The 2 side monitors are also powered on a 250GTS, so the center monitor can be fully dedicated to the 580's in SLI.


Anyhow.. some more updates....
Finished changing rusted screws to blingy screws:
IMG_0820.jpg


And last of the packages arrived:
IMG_0825.jpg


IMG_0826.jpg


mmmm... backplates!
IMG_0827.jpg


They go on like this.. however bitspower and koolance uses different holes on the core socket area... So there not shown, but i have them under the backplate:

IMG_0828.jpg


Now i gotta pull the one thats inside my computer, and backplate that... + setup sli + add those heat sinks to my DDC-2's.

Then i gotta sleeve, then i think i can call it complete.
 
Back
Top